This post may contain affiliate links, which means I make a small commission off items you purchase at no additional cost to you. Please read my disclaimer page.
I think ice cream is one of my favorite recipes to create. It’s honestly such a flexible dessert and super easy to customize. For this recipe, I experimented with sweetening the ice cream with pure maple syrup (whereas I usually use coconut sugar). My reasoning for this was to create whiter ice cream base. I find that coconut sugar makes ice cream more on the brown side (but still tastes AMAZING), and I wanted this to be more of a cream color since it’s a cookie dough ice cream. And let me tell you – this is my new favorite way to make ice cream! If you haven’t homemade ice cream with maple syrup as the sweetener yet, then you must give it a try. This Chocolate Chip Cookie Dough Ice Cream will be your new favorite treat.
Nutritional benefits of this recipe
This isn’t all the benefits, but a few of my favorite!
I always recommend buying grass-fed milk and cream. This ensures you are getting a healthier product (from healthier cows) and you are supporting a more regenerative farm. I love buying from a local farmer or from healthy brands like Kalona Supernatural or Mill-King that are low-heat pasteurized instead of ultra-pasteurized. The lower temps helps preserve many of the enzymes in the milk, which makes it easier to digest.
Maple syrup is a natural sweetener (from the sap of maple trees) so it’s healthy and also rich in antioxidants and minerals such as manganese, riboflavin, and copper.
Egg yolks are a good source of fat-soluble vitamins like A, D, E, and K, as well as B vitamins and choline, which is important for brain health. They also contain antioxidants like lutein and zeaxanthin, which are beneficial for eye health.
Not at all! It may seem daunting at first, but it’s way easier than you think. Most of the time for the ice cream is just chilling it, so you are only spending about 45 minutes or so actively working on it.
An ice cream container for storage. This helps significantly to keep the ice cream the proper texture. You can use a regular freezer-friendly Tupperware, but the ice cream may harden more.
Ingredients for Cookie Dough Ice Cream
For the ice cream:
Grass-fed heavy cream
Grass-fed whole milk
Pure maple syrup
Vanilla extract
Egg yolks – this makes the ice cream extra creamy – it’s essential in my opinion!
Key tips to always make the best homemade ice cream
Be sure to follow the directions on the recipe card to a T for the best turnout.
Freeze the ice cream bowl for several days, or at least 24 hours before making the ice cream.
Use an ice cream container for storage. This keeps it a much better texture than using another container that’s not designed for ice cream.
Use egg yolks if you like a thick, creamy ice cream. If you prefer a lighter ice cream, then omit the egg yolks.
Keep in mind, the ice cream is more of a soft-serve after it is done churning – this is totally normal. You can eat it this way if you would like, but you can also place it in the ice cream container and put it in the freezer for at least 5 hours or overnight for it to harden more if desired.
Method
***Make sure your ice cream bowl has been frozen for at least 24 hours (this is for the Cuisinart ICE-70 Series). You can also pre-freeze the container you plan to put the ice cream in if you want. I use this ice cream container and it’s the best! It helps keep a perfect ice cream texture, rather than freezing too hard.***
Ice cream:
In a large saucepan, mix together the milk and cream. Heat over medium heat, stirring with a whisk often, until steaming. Do NOT let it boil – just bring it to a steam.
In a large bowl using an electric mixer, beat the egg yolks with the maple syrup, vanilla extract, and salt until it lightens in color.
Once the cream/milk mixture is steaming, pour 1/3 of the hot mixture into the maple syrup bowl and mix together. Then add another 1/3 of the hot mixture and mix again. Then, pour everything back into the saucepan and place over LOW heat on the stove. Stir constantly on low heat for 2 minutes, then pour the mixture through a fine mesh sieve into a large bowl. Let it cool to room temperature for an hour then place in the refrigerator for at least 6 hours or overnight.
Make the cookie dough:
With an electric mixer, beat together the coconut sugar, butter, vanilla extract, and salt until lightened in color. Add the flour and beat until everything is combined into cookie dough texture.
Put parchment paper on a large baking sheet. Use a 1/4 tsp measurer to measure cookie dough, but then break it into two pieces and roll between your fingers to make two little cookie dough balls (each cookie dough ball should be 1/8 tsp of cookie dough). It may seem small, but you’ll be surprised by how big it is in the ice cream! Place on the parchment paper. Repeat over and over, making 1/8 tsp balls with the cookie dough until it’s gone.
Place in the freezer for 30 minutes to harden separate from each other, then put all the cookie dough balls in a freezer-friendly container (to prevent freezer burn) and store in the freezer until you’re ready to put it in the ice cream.
Churning the ice cream:
Press Ice Cream and then Start/Stop. Pour the mixture through the spout and then cover with the cap. Let mix 25 minutes until thickened (or according to your ice cream maker). During the last 5 minutes, add the finely chopped/slivered chocolate to mix into the ice cream. I prefer a light amount of chocolate (1 Tbsp), so add to preference – but you can start small and let it thoroughly mix before adding more if you’re not sure how much you want (keep in mind it takes a couple minutes for it to fully incorporate!).
To incorporate the cookie dough pieces: Remove the mixer from the ice cream bowl, dump the frozen cookie dough pieces into the ice cream, and mix it together with a spatula.
You can serve as soft-serve, or transfer the ice cream to an ice cream container and place in the freezer for 3-5 hours to harden.
I hope you love this Chocolate Chip Cookie Dough Ice Cream! Please be sure to leave a comment and rating below. I would love to know if you plan to make it, and how it turns out for you!
3 Tbsp salted butter (42g), softened/room temperature NOT melted
1/4 tsp vanilla extract
1/8 tsp salt
1/3 cup spooned and leveled (48g) white flour**, I use non-GMO & unbleached by Sunrise Flour Mill
Additional:
1–3 Tbsp finely chopped / slivered chocolate (or 1/3 – 1/2 cup mini choc chips if you like bigger pieces of chocolate instead of slivered chocolate – I prefer slivered chocolate and I do about 1 Tbsp)***
Instructions
Make sure your ice cream bowl has been frozen for at least 24 hours (this is for the Cuisinart ICE-70 Series). You can also pre-freeze the container you plan to put the ice cream in if you want. I use this ice cream container and it’s the best! It helps keep a perfect ice cream texture, rather than freezing too hard.
Ice cream:
In a large saucepan, mix together the milk and cream. Heat over medium heat, stirring with a whisk often, until steaming. Do NOT let it boil – just bring it to a steam.
In a large bowl using an electric mixer, beat the egg yolks with the maple syrup, vanilla extract, and salt until it lightens in color.
Once the cream/milk mixture is steaming, pour 1/3 of the hot mixture into the maple syrup bowl and mix together. Then add another 1/3 of the hot mixture and mix again. Then, pour everything back into the saucepan and place over LOW heat on the stove. Stir constantly on low heat for 2 minutes, then pour the mixture through a fine mesh sieve into a large bowl. Let it cool to room temperature for an hour then place in the refrigerator for at least 2-3 hours or overnight.
Make the cookie dough:
If you like a lot of cookie dough, then follow the ratios in the notes section (or if you plan to eat a spoonful, then you’ll definitely want to make the larger amount!).
With an electric mixer, beat together the coconut sugar, butter, vanilla extract, and salt until lightened in color. Add the flour and beat until everything is combined into cookie dough texture.
Put parchment paper on a large baking sheet. Use a 1/4 tsp measurer to measure cookie dough, but then break it into two pieces and roll between your fingers to make two little cookie dough balls (each cookie dough ball should be 1/8 tsp of cookie dough). It may seem small, but you’ll be surprised by how big it is in the ice cream! And keep in mind that if you make bigger pieces, then you’ll have less pieces throughout the ice cream. Place on the parchment paper. Repeat over and over, making 1/8 tsp balls with the cookie dough until it’s gone.
Place in the freezer for 30 minutes to harden separate from each other, then put all the cookie dough balls in a freezer-friendly container (to prevent freezer burn) and store in the freezer until you’re ready to put it in the ice cream.
Churning the ice cream:
Press Ice Cream and then Start/Stop. Pour the mixture through the spout and then cover with the cap. Let mix 25 minutes until thickened (or according to your ice cream maker). During the last 5 minutes, add the finely chopped/slivered chocolate to mix into the ice cream. I prefer a light amount of chocolate (1 Tbsp), so add to preference – but you can start small and let it thoroughly mix before adding more if you’re not sure how much you want (keep in mind it takes a couple minutes for it to fully incorporate!).
To incorporate the cookie dough pieces: Remove the mixer from the ice cream bowl, dump the frozen cookie dough pieces into the ice cream, and mix it together with a spatula.
You can serve as soft-serve, or transfer the ice cream to an ice cream container and place in the freezer for 3-5 hours to harden.
Notes
**If concerned about raw flour, then feel free to heat treat it – Preheat oven to 350ºF and spread flour onto a parchment paper lined baking sheet. Bake for 5-10 minutes, then sift through a fine mesh sieve and use as usual.
*If you like heavy amount of cookie dough in your ice cream, then increase the cookie dough ratios to the following amounts:
4 Tbsp salted butter (56g), softened/room temperature NOT melted
1/4 tsp vanilla extract
1/8 tsp salt
1/2 cup spooned and leveled (70g) white flour, I use non-GMO & unbleached by Sunrise Flour Mill
–
Another option for the incorporating the chocolate:
Another way I like to incorporate chocolate into ice cream is by melting it and pouring it into the ice cream as it’s churning – this creates the classic chocolate texture throughout the ice cream because the chocolate breaks up and hardens throughout the ice cream as it churns:
1/3 – 1/2 cup chocolate chips – I personally use 1/3 cup
Gently melt the chocolate and avocado oil together (either in a double boiler or in 15 second increments in the microwave). In the last few minutes of churning, pour the melted chocolate mixture into the ice cream as it churns and use a spoon to gently press the chocolate down into the ice cream while it churns – the chocolate will harden and break up throughout the ice cream as it churns.
Just real, simple ingredients. This is the perfect latte to cozy up during fall and winter!🍁🍂You can also find this Maple Cinnamon Latte on my website!For a HOT latte:
2 shots espresso @purity_coffee for mold-free
1 – 1 1/2 Tbsp pure maple syrup
1/8 tsp ground Ceylon cinnamon
Couple pinches of salt
1/2 tsp pure vanilla extract
5-8 oz of grass-fed milk, to preference1. Put the ground cinnamon, salt, vanilla extract, and maple syrup into a mug. Pour a double shot of espresso into the mug and blend it all together with a milk frother.
2. Steam the milk and pour into the mug. Enjoy!For an ICED latte:
2 shots espresso
1 – 1 1/2 Tbsp pure maple syrup
1/4 tsp ground Ceylon cinnamon
A few pinches of salt
1/2 tsp pure vanilla extract
6-8 oz of grass-fed milk, to preference1. Put the ground cinnamon, salt, vanilla extract, and maple syrup into a 16-oz cup. Pour a double shot of espresso into the cup and blend it all together with a milk frother.
2. Pour cold milk into it and fill the cup with ice. Enjoy!#maple #maplesyrup #cinnamon #latte #maplecinnamonlatte #healthylatte #eeeeats #buzzfeed #fallseason #autumn #falllattes #naturallysweetened #glutenfree #nutfree #healthyrecipe #healthyrecipes #healthychoices #healthycoffee #coffeerecipes #coffeereels #thefeedfeed #healthyfood #coffeevibes
Soft, fluffy, flavorful, AND healthier? Sign me up 🤌 I’m so excited for all the fall baking! And if you can’t tell from my recipes on my website lately, I’ve been obsessed with all things apple cider 🍎🍏Comment “donut” to receive the link to the recipe!Here are the ingredients:
Apple cider
Pastry flour or white flour
Coconut sugar
Maple syrup
Applesauce
Grass-fed butter
Cinnamon, cloves, allspice, salt
Baking powder, baking soda
Vanilla extract
EggThis recipe is literally SO good and I cannot wait for you to try it!#applecider #appleciderdonuts #donut #donuts #appleciderrecipe #fallbaking #fallseason #autumn #fallrecipes #falldesserts #footballseason #homemadedonuts #homemade #healthydessert #healthy #baking #aesthetic #delicious #eeeeeats
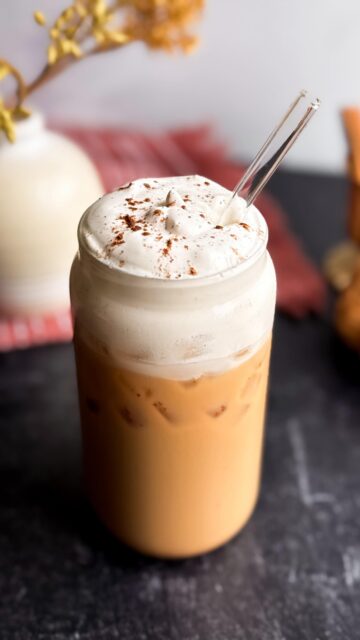
Healthy Pumpkin Spice Lattes = one of the best parts of Fall!!If you love a good PSL but you don’t like the crap that coffee shops put in them, then you’ll want to give this recipe a try 😍2 shots espresso
1 1/2 Tbsp pure maple syrup
1/4 tsp pumpkin pie spice
6 oz whole grass-fed milk
1 tsp pure vanilla extract
Optional: 1 Tbsp pumpkin puree
IceFor the whipped cream:
3 Tbsp grass-fed heavy cream
1 tsp pure maple syrup1. Put 1/4 tsp of pumpkin pie spice into a 16-oz cup.
2. Make a double shot of espresso and dump into the cup with the pumpkin pie spice. Also add the pumpkin puree if using. Use a milk frother to blend together well.
3. Then add the milk, maple syrup, and vanilla extract. Using the milk frother, mix well again to combine.
4. Add ice, filling it mostly to the top but leaving an inch or two for the whipped cream.
5. In a small mug, add the heavy cream and 1 tsp of pure maple syrup. Use a milk frother to mix the heavy cream until it becomes a thick whipped cream. This takes my milk frother about 20 seconds.
6. Pour the whipped cream on top of the drink, sprinkle some pumpkin pie spice on top, stick a straw into it, and enjoy!#pumpkinspicelatte #pumpkinspice #psl #pumpkinspicerecipe #icedlatte #icedlatterecipe #pumpkinrecipes #fallrecipes #autumn #falliscoming #autumnrecipes #pslrecipe #pumpkinspicelatterecipe #healthylatte #healthydrink #healthydrinks #pumpkinseason #pumpkineverything #fallweather #icedlattes #glutenfree #glutenfreerecipes
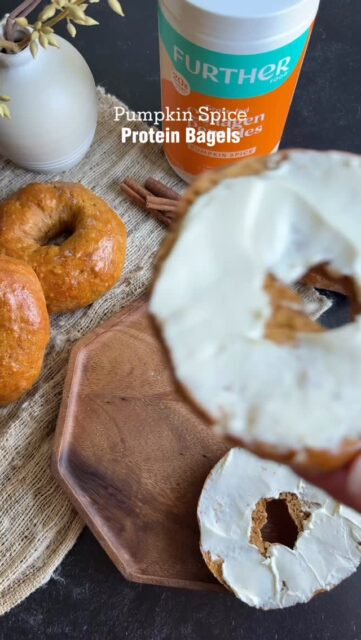
Please tell me I’m not the only one that is beyond excited for fall!! It’s truly my favorite time of year with the cozy weather and the delicious recipes. If you love pumpkin spice recipes, then you’ll definitely want to give these Pumpkin Spice Protein Bagels a try!There are 20 grams of protein in each bagel 👏Dry:
265g flour (1 1/2 cups packed)
33g @Furtherfood Pumpkin Spice Collagen Peptides (1/4 cup)
18g coconut sugar (2 Tbsp)
2 tsp (7g) baking powder
1/2 tsp (2g) pink himalayan or sea salt
1/2 tsp (2g) vanilla powder
1/4 tsp (1g) pumpkin pie spice
Wet:
170g (3/4 cup) thick, non-fat greek yogurt
88 g pumpkin puree (1/3 cup)
Additional:
1 egg, whisked and set asideMethod:
1. Preheat the oven to 350ºF. Line a large baking sheet w/ parchment paper.
2. In a mixing bowl, combine the dry ingredients.
3. Add the yogurt and pumpkin and mix with a spatula until it’s a shaggy dough.
4. Dump the shaggy dough onto a floured surface. Knead together with a floured hand until it’s a smooth ball. The dough should not be sticky, so add a bit more flour if needed.
5. Let it rest for 5-10 minutes.
6. Divide the dough into 4 equal portions. Roll each portion into a ball, stick your thumb through the center to create a hole and stretch and form into a large bagel with about 1.5” hole in the center. Repeat with each portion.
7. Place them on the lined baking sheet and brush with the whisked egg for an egg wash.
8. Bake the bagels for 25-35 minutes, or until med-deep golden brown on top. Remove from the oven and let them cool on the baking sheet. The texture becomes better as it cools.To store: Let the bagels cool completely to room temperature first. Then store in an airtight container in the refrigerator and eat within 5 days. You can also store in the freezer for up to 3 months – freeze them individually wrapped and placed in a freezer friendly container. When ready, let thaw at room temp for a couple hours or in the refrigerator overnight.#pumpkinspice #pumpkinseason #pumpkinrecipes #pumpkinspiceseason #bagels #homemadebagels #protein #highprotein #highproteinmeals #collagen #healthyrecipes #healthyrecipeshare #pcos #hormonehealth #healthylifestyle #recipeideas
These pancakes are truly so yummy and easy! They’re higher in protein than most pancakes because I added yogurt to the batter. @kalonasupernatural_milk_dairy launched their yogurt at @Sprouts, so be sure to stop by to grab some! I love Kalona’s yogurt because it’s low-heat pasteurized which makes it healthier and easier to digest!Ingredients
1 cup flour spooned and leveled (133g)
1 tsp baking powder (5g)
1/4 tsp baking soda (2g)
1/4 tsp salt (2g)
1 medium very ripe banana, mashed (95g)
1/2 cup grass-fed plain yogurt (135g)
1/2 cup grass-fed milk (4 oz)
1 large egg
1 tsp vanilla extractTopping:
Pure maple syrup or honey
Sliced banana
Anything else you want!Method:
1. Preheat a cast iron skillet to medium heat while prepping everything. If using a regular skillet, it won’t take as long to heat up.
2. In a large bowl, mix together the dry ingredients thoroughly.
3. Add the wet ingredients and gently whisk to combine, but do not over-mix the batter.
4. Add some grass-fed butter, or avocado oil or coconut oil to the pan if needed and pour 1/4 cup of batter onto the pan for each pancake (do not overcrowd, this will take several batches). Cook for a couple minutes until bubbling slightly and the bottom is golden brown. Flip and cook another 1-2 minutes.
5. Repeat until all the batter is gone. Makes 8 pancakes.
6. Plate, top as desired, and enjoy!#pancakes #bananapancakes #bananarecipes #banana #healthypancakes #healthybreakfastideas #highprotein #highproteinbreakfast #thefeedfeedbaking #eeeeeats #eeeats #healthyrecipe #healthyrecipes #pcos #recipesharing #yogurt #buzzfeed #healthyeats #healthy
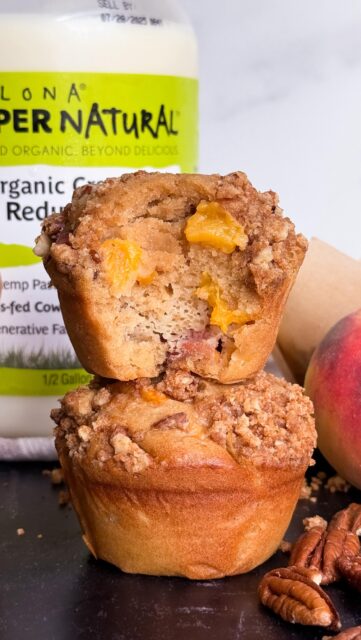
These naturally sweetened peach muffins are so moist and flavorful with the most delicious, buttery pecan crumble on top. You’ll definitely want to make these ASAP before peach season is over! 🍑🥛@kalonasupernatural_milk_dairy has officially launched their 2% milk at @sprouts, so be sure to stop by to pick some up for this recipe!! I love Kalona’s milk because it’s from grass-fed cows and it’s low-temp pasteurized, which helps keep many of the beneficial enzymes intact for digestion compared to high-temp pasteurization.Ingredients:
2 cups organic peaches, diced (2-3 peaches)
Wet:
1 cup 2% milk by @kalonasupernatural_milk_dairy
1/2 cup avocado oil (or melted and cooled coconut oil or grass-fed butter)
2 large eggs
1 Tbsp honey (21g)
1 tsp vanilla extract
Dry:
2 cups white flour, spooned and leveled (282g)
1/2 rounded cup coconut sugar (90g)
1 1/2 tsp baking powder (6g)
1/2 tsp baking soda (3g)
1/2 tsp salt (3g)Pecan Crumble
2/3 cup flour (90g)
1/2 cup finely chopped pecans (50g)
1/3 rounded cup coconut sugar (65g)
4 1/2 Tbsp butter, melted (63g)1. Preheat the oven to 375ºF and line a muffin tin with tulip muffin liners (these liners are bigger, which give more space for these extra large muffins!)
2. Dice the peaches and set aside.
3. In a small bowl, mix together the crumble topping with a fork until it forms a crumb.
4. In a large bowl, whisk together the wet ingredients.
5. In a medium bowl, mix together the dry ingredients.
6. Add the dry ingredients to the wet and mix until combined, but do not over-mix.
7. Fold in the peaches. Scoop the batter into the tulip muffin liners and top with a spoonful of the pecan crumble.
8. Bake 22-25 minutes, until a toothpick inserted into the middle comes out clean.#muffins #peach #healthymuffins #healthyrecipe #healthyrecipes #recipeshare #thefeedfeedbaking #thefeedfeed #eeeeeats #pcos #healthybaking #gettinghealthy #mealprep #healthyrecipeideas #buzzfeedhealth #healthydiet #healthyliving #healthyeating
I’ve seen lots of people who eat Rice Krispies as a pre-workout energy-boosting snack, but instead of filling your body with inflammatory sugar, you can now make these healthier marshmallows instead! I used honey as the sweetener, and I infused some lavender into them as well. Lavender is great for relieving anxiety, so if you get pre-gym anxiety, then you’ll love these marshmallows! They’re also rich in gelatin, which supports joint health and helps you recover from your workout quicker. Annnnd I put egg whites in them for a protein boost that also makes it a more balanced snack.5 egg whites
1/4 cup water (2oz)
1/4 cup @furtherfood gelatin (40g)
1 cup honey (350g)
1/2 tsp vanilla extract
1/4 tsp lavender leaf powder
1/4 tsp salt1. Line a 9×13 baking dish with parchment paper.
2. Make lavender powder: Use a mortar and pestle to crush into a powder, or I actually just blended dried lavender leaves in my coffee grinder until it became a powder. Just FYI – you’ll need to do a couple Tbsp to get it to blend. Doing too small of an amount will just move it around but not actually blend into powder.
3. In a large bowl using an electric mixer with the whisk attachment, beat egg whites on high for 3 mins until they firm up and form a soft peak when you turn off the mixer and remove the whisk.
4. In a small saucepan, heat the water over medium heat for just 30-60 seconds until warm (not too hot). Whisk in the gelatin, then add the honey, lavender, vanilla extract, & salt and whisk together. Let sit on low heat for a minute or two, stirring consistently.
5. Slowly pour the hot gelatin mixture into the egg whites while beatjng together, beat for 8-10 mins until it thickens & creates peaks. Pour into the prepared pan and spread into an even layer with a spatula. Let sit at room temp for 4+ hours to firm up. Slice into squares & store leftovers in an airtight container the fridge for up to 7 days.#marshmallows #healthybaking #honey #lavender #refinedsugarfree #honeylavender #eeeeeats #healthyeats #recipeshare
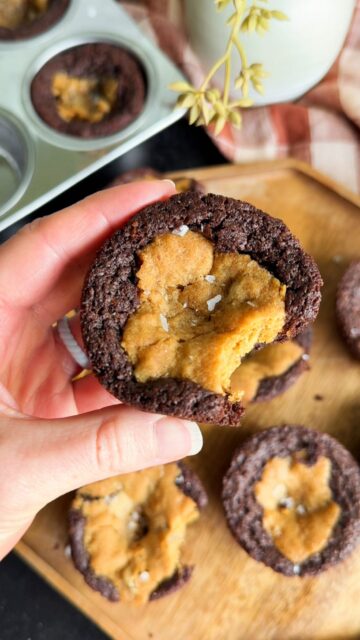
A refined sugar free dessert for the win 🙌 If you can’t decide between cookies and brownies, then Brookies are the answer 😍 you’ll definitely want to save this recipe! It’s a healthier recipe because I use coconut sugar as the sweetener (which tastes like brown sugar), there’s also no seed oils, etc. Just real, natural, wholesome ingredients!Comment RECIPE for the link to be sent to your messages! That way you will be able to print off the recipe card (if you want) and use it as often as you like!#brookies #brownies #cookies #refinedsugarfree #coconutsugar #healthydessert #pcosdessert #healthyrecipe #norefinedsugar #naturallysweetened #eeeeeats #eeeeats #tastydessert
This Collagen Matcha Latte is my go-to for almost anytime I make matcha. It’s just so simple and delicious and is one of my favorite ways to include collagen in my day. I also love being able to use dates because they’re healthy and may I say YUMMY 😍 it’s the best!1 large medjool date (or 2 small-medium), pitted
1/4 cup hot water (to soften the date)
1 cup milk of choice
1/2 tsp pure vanilla extract
1 tsp matcha powder
2 Tbsp collagen peptides @furtherfood1. Put the date in a ramekin and cover with hot water. Let it sit for 5 minutes to soften.
2. Put the softened date into a blender (discard the water). Add the milk, vanilla extract, matcha powder, and collagen. Blend for 1-2 minutes until creamy and frothy and until the date is completely blended in.
3. Pour into a cup with ice and enjoy!#matcha #matchalatte #icedmatcha #collagen #collagenpeptides #proteinmatcha #protein #healthyrecipe #healthyrecipeideas #thefeedfeed #eeeeeats #healthydrink #latte #healthyliving #healthyeating


10/10 would eat this as every dessert!
What an amazing compliment!! So glad you enjoyed it, Izzy!
Absolutely delicious and way better than any store bought brand!
Aww yay!!! So glad it was such a hit!
Yummmm! Can’t believe this is healthy. Perfection 🙂
Really can’t get better than a healthy + delicious ice cream! Glad you loved it!!:)
Better than blue bell!
Wow! So glad to hear you enjoyed it that much!! The best compliment 🙂
INSANE how good this ice cream is. 100/10!!!
You just made my day!! So glad you enjoyed it, Jessica! Thanks for taking the time to leave a review 🙂