This post may contain affiliate links, which means I make a small commission off items you purchase at no additional cost to you. Please read my disclaimer page.
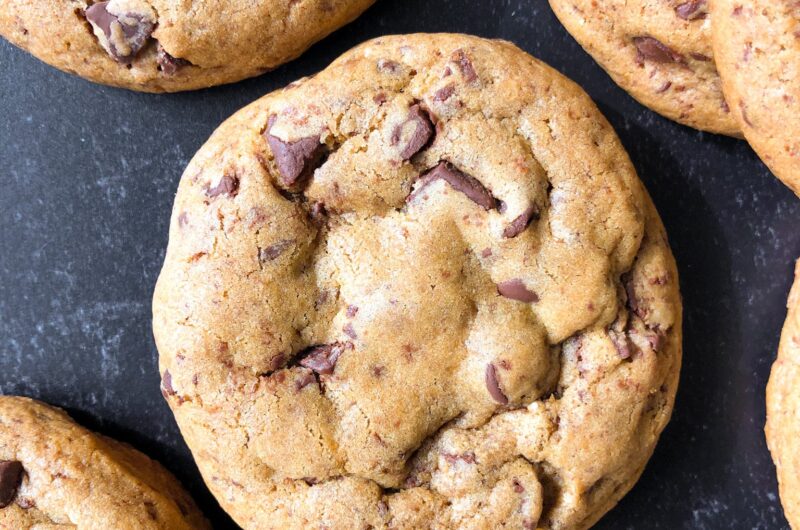
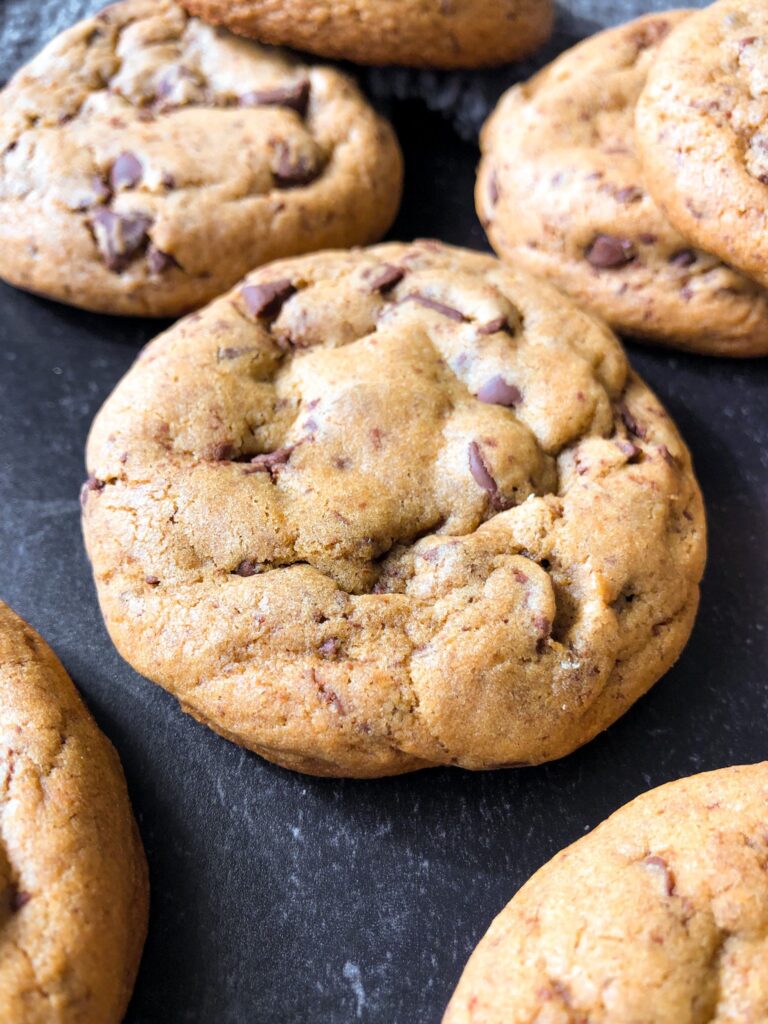
These chocolate chunk cookies are deliciously indulgent yet boast lower-glycemic ingredients because we’re using coconut sugar and maple syrup as the sweeteners. If you don’t think a healthier cookie recipe will taste just as good as traditional cookies, then this recipe will prove you wrong! These cookies are thick, chewy & gooey, and full of delicious flavor.
What ingredients are needed for chocolate chunk cookies?
White flour – This recipe uses white flour from Sunrise Flour Mill. I like using their flour because it’s non-GMO, unbleached, and properly milled. Read more about their flour here. Any other white flour will work for this recipe though!
Coconut sugar – This is a 1:1 replacement for white sugar but is natural and unrefined. Coconut sugar is the dehydrated sap of the coconut palm and has a “golden” taste to it, much like brown sugar.
Maple syrup – This is used to add moisture to some of the coconut sugar in order to mimic the moistness of brown sugar. Maple syrup is rich in vitamins, minerals, and antioxidants. It is the sap from maple trees and is rich in flavor.
Salted Butter – This is such a necessity for the classic buttery flavor in cookies. I always use grass-fed butter because it’s nutrient-dense and much better for us and the cows.
Vanilla extract – This adds the perfect flavor to achieve more depth and deliciousness.
Eggs – These help create the perfect texture.
Baking soda -Make sure it’s fresh! If your baking soda is more than a couple months old, replace it please. I typically replace mine every month. I always place my older, unused baking soda container in my refrigerator because it helps deodorize and keep the refrigerator fresh. Just take off the top flaps and put it in the back of your refrigerator. It’s a great way to use it rather than throwing it away when you buy new ones!
Salt – We all know salt adds flavor and depth to everything! I use pink Himalayan salt but feel free to use what you have on hand.
Chocolate -Here’s where you get to be creative. You can use your favorite chocolate bar and chop it into chunks, or just chop up your favorite chocolate chips. I love using semi-sweet chocolate for a simple version, but if you want an even more indulgent version, then go ahead and use a combination of semi-sweet, dark, and milk chocolate. Having all three of them in the cookies makes them unbelievable!. You can also opt for toffee, white chocolate, or another fun flavor (or better yet, a combination of them!).
The Most Important Cookie Baking Tips
- Use softened (room temp) butter, not melted. This ensures that it doesn’t coagulate with the other ingredients or slightly “cook” the eggs. Using melted butter also creates a flatter cookie, whereas room temp butter will prevent the cookie from spreading too much.
- ALWAYS use fresh baking soda. It makes a difference! Replace your baking soda 1-2 months after it’s first opened. Just write the date to replace it by on the container so you don’t forget. Fresh baking soda is very important to ensure proper rise in baked goods. I honestly buy a new container of baking soda every month! I simply write it on my grocery list at the beginning of each month. If you don’t like the thought of throwing away containers of bakings soda regularly, then remember that baking soda has lots of other uses. It can be used for cleaning, de-odorizing, laundry, etc.
- Test a cookie before you bake the entire batch. It’s always a good idea to test one cookie before baking, since altitude and ovens vary and you want to make sure you do what you need for your specific baking conditions.
- If you want thinner cookies, then check out my Refined Sugar Free Nestle Toll House Cookies.
Storing & freezing chocolate chunk cookies
- To store: These chocolate chunk cookies will stay good at room temp in an airtight container for about 4-5 days. If you’re going to keep these cookies longer, I’d suggest freezing the dough or the cookies themselves.
- To freeze dough: Freeze the cookie dough for up to 2 months. You can either freeze it as cookie dough balls or as a log (If freezing the whole batch, then freeze it in two logs)
- For freezing cookie dough balls: Step 1: Place a piece of parchment paper onto a cookie sheet Step 2: Roll the cookie dough into balls, 2 Tablespoons (40g) of dough for each ball and place the cookie dough balls on the parchment paper. Step 3: Put in the freezer for 30 minutes. This is called a flash freeze, and will prevent the cookie dough balls from sticking together when you freeze them in a container. Step 4: Transfer them to a freezer-safe bag or container and place in the freezer for up to 2 months. Step 5: When ready to bake, remove the cookie dough from the freezer and put them on a baking sheet to allow them to warm up a little at room temperature while the oven preheats. Preheat the oven to 350ºF. Once the oven is preheated, put them in the oven and bake for 10-14 minutes.
- For freezing a cookie dough log: Step 1: Roll the cookie dough in a log (or two of them if you are freezing the entire batch). Step 2: Wrap it in Saran Wrap then place in a freezer friendly container. Step 3: Keep in the freezer for up to 2 months for best flavor and texture. Step 4: When ready to bake, remove the cookie dough log from the freezer then preheat the oven to 350ºF. Once the oven is preheated, remove the cookie dough from the Saran Wrap and slice it into thick slices (about 2 Tablespoons of dough (40g) for each cookie). Place the slices on the cookie sheet and bake for 10-14 minutes.
- To freeze baked cookies: You can freeze baked chocolate chunk cookies for up to 2 months. Step 1: Let the cookies fully cool down to room temperature. This will prevent them from freezing with too much moisture on them and creating freezer burn. Step 2: For freezing, you have two options: a) Individually wrap them before placing in a freezer friendly container, or b) Transfer them unwrapped to a reusable freezer-safe bag or container lined with parchment paper, and place parchment paper between each layer of cookies – So you can stack the cookies in the container, but in order for them not to stick (since they’re not individually wrapped), put parchment paper between each layer of cookies. Step 3: Place them in the freezer for up to 2 months. Step 4: Once ready to eat, simply thaw out at room temperature on a paper towel. I would not recommend thawing them in the container that they were frozen in because they may become soggy.
More cookie recipes you’ll love
- Refined Sugar Free Nestle Toll House Cookies
- Gooey Chocolate Chip Cookies (gluten-free, dairy-free)
- Chewy Oatmeal Raisin Cookies (gluten-free)
- Fluffy Grain Free Choc Chip Cookies (gluten-free, dairy-free)
- Healthy Chocolate Chip Cookie Skillet (gluten-free, dairy-free)
Get all of my dessert recipes here!
I hope you love these Chocolate Chunk Cookies with Coconut Sugar! Please be sure to leave a comment on the post and a rating on the recipe card. Your support means the world to me!
PrintThe Best Choc Chunk Cookies with Coconut Sugar
- Prep Time: 15
- Cook Time: 11
- Total Time: 26 minutes
- Yield: 18 cookies 1x
- Category: Dessert
- Method: oven
Ingredients
Dry:
2 1/2 cups (350g) white flour, I use non-GMO & unbleached by Sunrise Flour Mill
1 tsp baking soda (make sure it’s fresh!)
1 tsp salt
Wet:
1 1/3 cup coconut sugar (230g)
1 1/2 sticks salted butter (170g), softened/room temperature NOT melted
2 Tbsp maple syrup (32g), room temperature
2 tsp vanilla extract
2 large eggs, room temperature
Extra:
1 1/3 cups chopped chocolate – Use semi-sweet for simplicity, or for a more flavorful cookie use a combination of semi-sweet, dark, and milk chocolate.
Instructions
- In a small bowl, combine the flour, baking soda, and salt.
- In a large mixing bowl, beat the coconut sugar, softened butter, vanilla extract, and maple syrup until creamy and lightened in color, about 2 minutes. Use an electric mixer. Add one egg and beat well. Add the remaining egg and beat well again. Gradually beat in the flour mixture, 1/2 cup at a time.
- Fold in the chopped chocolate.
- Transfer to the refrigerator and cool for 30-60 minutes, or up to 2 days if you want to prep ahead of time (make sure it’s covered well if storing for more than 30-60 mins).
- Preheat the oven to 350ºF. Read through the rest of the steps to get a good idea of what you’ll be doing for the best outcome.
- Roll the dough into balls, about 2 Tbsp (40g by weight) for each cookie. I used a #40 cookie scoop and did rounded scoops. Put them directly on the pan (I don’t recommend parchment paper for these). Keep the cookie dough in the refrigerator between cooking sessions, as this will take a few sessions to cook it all.
- Bake 10-13 minutes. Since coconut sugar already makes the dough darker, these are just a bit harder to tell, but they should be slightly browned on the bottom edges and no longer gooey in the middle. It may be helpful to start by cooking 1 cookie first to see how it cooks for you according to your oven/altitude/etc. Better to commit to one than all!
- I know it’s hard, but let the cookies cool on the baking sheet for 10-15 minutes before enjoying. It’s well worth the wait because the cookies have time to set!
- Repeat for the leftover dough, or you can freeze the dough. Read through the post to see instructions for freezing the dough (and also for freezing cookies). Enjoy!
- Please leave a review and a comment if you made this recipe! It helps my website more than you know and I truly appreciate it!
Notes
For large cookies, use 3 Tbsp (57g by weight) for each cookie. Bake 14-18 minutes.
For small cookies, us 1 1/2 Tbsp (28g by weight) for each cookie. Bake 9-11 minutes.


10/10 flavor. 10/10 texture. 1000/10 will have again
YAY! So glad!!! 🙂
Our family enjoyed this recipe. I have to make more tomorrow! Thanks for all the notes they are very helpful.
Very glad it turned out well for you and that everyone loved it! And glad to hear the notes were helpful 🙂
New favorite cookie! They melt in your mouth! Absolutely love this recipe
Awwh you are so sweet!! Glad you loved it 🙂
So delicious! Had them for a girls night and everyone loved them!
Awwhh love that!! Thanks for the review 🙂
These are super delicious! Highly recommend making these for your next event
So glad to hear!! Thank you 🙂