This post may contain affiliate links, which means I make a small commission off items you purchase at no additional cost to you. Please read my disclaimer page.
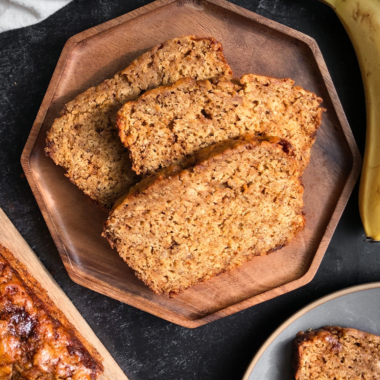
I started getting a lot of questions about sourdough baking after I posted my recipe for Sourdough Banana Bread, so I figured why not write a post all about it! If you’ve ever wondered what it takes to make sourdough bread and other sourdough goodies, then let’s go over all the basics as well as essential items needed.
What is sourdough?
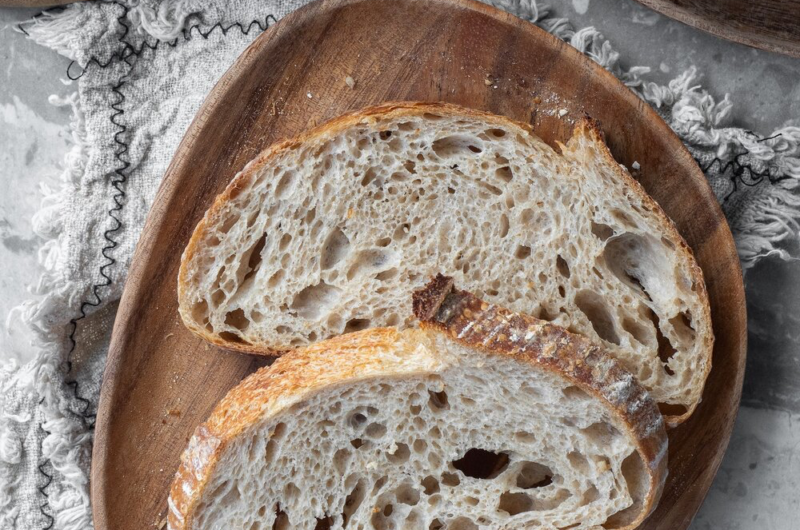
Sourdough is a type of bread made using a natural leavening agent called a sourdough starter, which is a mixture of flour and water that has undergone fermentation. The unique aspect of sourdough bread is that it relies on wild yeast and lactic acid bacteria, rather than commercial yeast, to leaven the dough and develop its distinctive flavor.
What is sourdough starter?
The sourdough starter is created by combining flour and water and allowing it to ferment. During this fermentation process, wild yeast and bacteria from the environment, particularly lactobacilli, colonize the mixture, creating a living culture. The yeast and bacteria work together to convert the sugars in the flour into carbon dioxide and lactic acid, leading to the rising of the dough and the development of a tangy flavor, hence the name “sourdough.”
How do you use sourdough starter in bread making?
Once the sourdough starter is mature and active, it can be used as the leavening agent for making sourdough bread. The basic process of making sourdough bread involves mixing the sourdough starter with more flour, water, and salt to form a dough. The dough is then left to ferment and rise for an extended period, typically several hours to overnight. This slow fermentation process not only gives the dough its characteristic flavor but also breaks down gluten and phytic acid in the flour, making the bread more easily digestible and nutritious.
After the fermentation, the dough is shaped into loaves and left to proof for another shorter period to allow it to rise further. Finally, the bread is baked at high temperatures, creating a crusty exterior and a soft, chewy interior with the classic sourdough taste.
How do you use sourdough starter in other baked goods?
Sourdough starter can be a versatile and flavorful addition to a wide range of baked goods beyond traditional sourdough bread. When using sourdough starter in other baked goods:
- Ensure it is active and has been recently fed. An active starter will have bubbles and rise in volume after feeding.
- Adjust the recipe: Aside from the the natural yeast and bacteria present in the starter, think of it as equal parts flour and water by weight (as long as you’ve been measuring by weight when feeding it). Take your chosen recipe and determine how much starter to incorporate and reduce the amount of liquid and flour in the recipe to accommodate the starter. For example, if you add 4 oz of sourdough starter, then you are essentially adding 2 oz of flour and 2 oz of water. Therefore, you’ll want to reduce the flour in the recipe by 2 oz, and the liquid in the recipe by 2 oz. The liquid would be water or milk, don’t replace oil, butter, or liquid sweeteners like honey.
- Mix the ingredients: Integrate the sourdough starter into the recipe, combining it with the other ingredients. It may replace part or all of the traditional yeast or leavening agents in the recipe, depending on how much starter you use and if you give it time sit out to ferment. If you don’t want to let it ferment, then still use the leavening agents called for in the recipe.
- Bake as directed: Once your sourdough starter is successfully integrated into the recipe, bake or cook the item as directed. Enjoy the unique taste and benefits that sourdough brings to your baked goods and other treats.
Remember, when using sourdough starter in recipes, it’s essential to maintain an active and healthy starter. Also be prepared to adjust the recipe and fermentation times based on your sourdough starter’s strength and the desired outcome of your baked goods. The more you experiment, the better you’ll become at incorporating sourdough starter into a variety of recipes.
How do you use sourdough discard in recipes?
It’s a little less complicated to use sourdough discard in baked goods because you are not relying on it being active, therefore you are not using it as a leavening agent. You can just add discard to the recipe using these steps:
- No need to feed it: For sourdough discard recipes, you’ll be using unfed starter (the portion you throw out right before feeding the starter again). However, keep in mind you do not want to use super old, sour starter because the pungent sour flavor will come out in your baked goods. Although it doesn’t need to be freshly fed and active, you’ll want to use discard that has been taken care of and fed regularly in general.
- Adjust the recipe: Aside from the the natural yeast and bacteria present, think of discard as equal parts flour and water by weight (as long as you’ve been measuring by weight when feeding it). Take your chosen recipe and determine how much discard to incorporate and reduce the amount of liquid and flour in the recipe to accommodate the discard. For example, if you add 4 oz of sourdough discard, then you are essentially adding 2 oz of flour and 2 oz of water. Therefore, you’ll want to reduce the flour in the recipe by 2 oz, and the liquid in the recipe by 2 oz. The liquid would be water or milk, don’t replace oil, butter, or liquid sweeteners like honey.
- Mix the ingredients: Integrate the sourdough discard into the recipe, combining it with the other ingredients.
- Bake as directed: Once your sourdough discard is successfully integrated into the recipe, bake or cook the item as directed.
Why is sourdough baking special?
Sourdough baking is loved by many due to the complexity of flavors, the connection to traditional baking techniques, and the health benefits associated with natural fermentation. Additionally, each sourdough starter can develop unique characteristics based on the specific yeast and bacteria present in the local environment, making each batch of bread a distinctive creation.
Essentials for sourdough baking:
Sourdough starter: The most critical ingredient is the sourdough starter. You can either create your own starter by fermenting flour and water over a couple weeks or obtain a mature starter from a friend or a reputable source.
Jars for holding starter – You can use a bowl and cover it with Saran Wrap, but wide mouth jars are very handy because they take up less space than bowls since they’re taller rather than wider.
Food Scale – You really can’t go without a food scale for sourdough recipes! It’s important to measure by the gram, so they come in very handy.
Flour: I use Sunrise Flour Mill heritage flour, but most commonly used flours include all-purpose flour, whole wheat flour, rye flour, or a combination of these to achieve different flavors and textures.
Water: Clean, chlorine-free water is necessary for both creating and feeding the sourdough starter and for mixing the dough. Using tap water would still work, but it’s helpful to use filtered water that is chlorine-free for the absolute best results.
Salt: Used to add flavor and control the fermentation process. I use pink Himalayan salt.
Large mixing bowl: A large mixing bowl is needed to combine the ingredients and form the dough – it’s typically quite a lot of dough.
Bannetons or proofing baskets: A banneton or “proofing basket” is a basket made of cane or wood used to support the dough during the final proofing stage. It helps the dough maintain its shape and form a beautiful crust. You’ll likely want a set of two unless you make small batches.
Bench scraper: A tool used to help handle and shape the dough, as well as clean the work surface.
Dutch oven: A Dutch oven with a lid is used for baking the sourdough bread. The covered environment helps create steam, which enhances the crust formation.
Dough lame or razor blade: A lame is a small, curved razor blade used to cut the top of the dough before baking. This process, called “scoring” allows the dough to expand properly during baking because it gives a specific area for the build up of pressure to release during the baking process.
Cooling rack – It’s important to let the bread cool on a rack because this allows air to flow to the bottom of the bread which prevents the bottom crust from being chewy and hard to cut through.
Parchment paper: To transfer the dough into the hot Dutch oven easily.
General Sourdough Kit
Here’s a sourdough kit that includes two proofing baskets (bannetons), a bench scraper, bread lame, and more.
Optional tools and ingredients include:
Dough Whisk or Stand Mixer: While not necessary, a dough whisk or stand mixer with a dough hook can make the mixing process easier.
Oven-proof bowl with water: For adding steam to the oven during baking if you don’t have a covered baking vessel.
Whole Grains: To add texture and flavor to your sourdough, you can include whole grains or seeds in the dough or sprinkle on top of the dough just before cooking.
Oven Thermometer: To ensure your oven is at the correct temperature, it’s helpful to have an oven thermometer, as oven temperatures can vary.
Most commonly asked questions about sourdough baking:
- What is a sourdough starter, and how do I make one from scratch? A sourdough starter is a mixture of flour and water that has undergone fermentation, capturing wild yeast and beneficial bacteria from the environment. To make a sourdough starter, mix equal parts of flour and water (by weight using a kitchen scale) in a jar and let it sit at room temperature, discarding half of the mixture and feeding it with fresh flour and water daily for about 5-10 days, or until it becomes bubbly and doubles in size within a few hours of being fed.
- Where can I purchase a sourdough starter that is already mature? You may be able to find one at health food stores such as Natural Grocers. You can also find them online; I’ve actually bought this one before and loved it. The company is great and the starter was easy to grow and use. Also, if you know someone who has sourdough starter, then you can ask them for a small portion of theirs. You only need a couple tablespoons to get started. You’ll just feed the starter until it grows enough to use.
- How do I know if my sourdough starter is active and ready to use? Signs of an active starter include visible bubbles, a pleasant tangy aroma, and the ability to double in size within a few hours after feeding.
- How do I maintain and feed my sourdough starter? To maintain a sourdough starter, keep it at room temperature if baking daily, or store it in the refrigerator and feed it once a week if baking less frequently. Feed the starter by discarding a portion of it and adding equal amounts of fresh flour and water, measuring by weight using a kitchen scale.
- Do I have to actually throw away part of the starter every time I feed it? For best results, you’ll want to remove some of the starter before feeding it. This helps balance the pH and also prevents it from growing way too much and taking over your home (joking but not joking lol). You don’t have to throw it in the trash though, you can use it in sourdough discard recipes! For example, I have Sourdough Banana Bread that you can use discard for and Sourdough Discard Oat Pancakes.
- What kind of flour should I use for sourdough baking? You can use a variety of flours, including all-purpose flour, whole wheat flour, rye flour, or a combination of these to achieve different flavors and textures. Some recipes may also incorporate other specialty flours such as heritage flour.
- Why is my sourdough not rising? Several factors can affect the rise of sourdough, including an inactive starter, low room temperature, over or under fermentation, or insufficient hydration. Troubleshoot by adjusting your technique or environment. First make sure to discard a portion of your starter before feeding it and measure your flour and water by weight using a food scale. This helps create a healthy pH for the starter to flourish.
- How long does sourdough bread take to rise and ferment? The time can vary depending on factors like temperature, hydration, and the strength of the starter. On average, bulk fermentation can take 4-6 hours, and the final proofing can take 1-4 hours at room temperature, or overnight in the refrigerator.
- Should I do the final proof at room temperature or in the refrigerator? I prefer to do the final proof overnight in the refrigerator because it’s hard to fit the whole sourdough baking process within a day. Another reason is that the cold environment of the refrigerator helps the dough stiffen a little, which makes it much easier to score the bread (making a slit in the top of the dough with a bread lame just before placing it in the oven).
- Why do I need to create a split in the dough before baking? The process of scoring the dough gives the dough a place to release pressure as it is baking. It helps prevent the bread from popping in the oven, creating an ugly crust. Scoring the bread allows you to control how it turns out, and you can even create pretty designs.
- Can I speed up the sourdough fermentation process? While traditional sourdough baking relies on slow fermentation for flavor development, you can experiment with warmer temperatures, higher hydration, or a more active starter to shorten the fermentation time.
- What causes a sourdough bread to taste overly sour or not sour enough? The sourness in sourdough comes from lactic acid produced by bacteria. A longer fermentation or a higher proportion of starter to flour can make the bread more sour, while a shorter fermentation or less starter can yield a milder flavor.
- Can I use sourdough starter in recipes that call for commercial yeast? Yes, you can often substitute commercial yeast with sourdough starter in recipes, but it may require adjusting the recipe’s rising times and techniques.
- What equipment do I need for sourdough baking? Essential equipment includes a large mixing bowl, food scale, banneton/proofing basket, Dutch oven or baking stone, bench scraper, and a lame/razor blade for scoring.
- What does it mean to shape sourdough bread? Shaping involves gently stretching and folding the dough to create tension on the surface, giving the bread structure and preventing it from spreading during baking. There are various shaping techniques, like boules or batards. You can easily search videos on YouTube to see shaping techniques.
- How do I get a crispy crust on my sourdough bread? Achieve a crispy crust by first baking the bread in a preheated Dutch oven, then removing the top of the dutch oven for the last 20 minutes or so of baking. If baking it in a regular loaf pan or on a baking stone, then you can add steam to the oven during the first part of baking to promote crust development. You can do this by placing an oven-proof bowl with water on the bottom rack of the oven. It will evaporate in the heat, causing steam.
- What are some gluten-free sourdough options? Gluten-free sourdough can be made using alternative flours like rice flour, oat flour, buckwheat flour, sorghum flour, or a combination of gluten-free flours and starches.
- Can I add other ingredients like seeds or dried fruits to my sourdough bread? Yes, you can add various ingredients like seeds, nuts, dried fruits, or even herbs to your sourdough bread to customize the flavor and texture.
- Is sourdough bread healthier than regular bread? Sourdough bread may offer certain health benefits due to the fermentation process, such as reduced phytic acid and potentially improved digestibility. However, individual dietary needs and preferences should be considered.
I hope all of this information helps and encourages you to begin your journey of sourdough baking! It’s truly amazing to have the ability to bake your own bread from scratch and learn all the ins and outs over the years. And sourdough baking is special because you can add sourdough discard to just about any baking recipe. It takes practice and patience, but once you learn how to use it, it’s super fun. If you are still nervous about taking up sourdough baking, then I encourage you to watch this video by Pro Home Cooks. It covers the most common mistakes made in sourdough baking and was helpful for me to learning in the beginning because you can visually watch the process of mixing, fermenting, shaping the dough, etc.
Let me know down in the comment section if you loved this post and if you have any other questions I can answer for you. I would also love recipe requests if you have them!


