
This post may contain affiliate links, which means I make a small commission off items you purchase at no additional cost to you. Please read my disclaimer page.
Tired of using chemical-filled candles but still want to enjoy the cozy feel that a glowing candle brings? Beeswax candles are the answer! They are easier to make than you may think – they only take 15-30 minutes to make, then you have beautiful, delicious smelling candles ready to burn whenever you feel like it.
Benefits of beeswax candles
- Less chemicals. The ingredients are beeswax, coconut oil, and essential oils, so not only is it not made with chemicals, but it also does not create any toxic byproducts when being burned.
- Beeswax is a natural air-deodorizer and purifier.
- You can make your own unique scents – instead of choosing pre-made scents, you can create your own combinations and get creative.
- Hormone friendly – Candles loaded with chemicals are pretty bad for our health, and specifically our hormone health. Opt for natural, beeswax candles for a healthier alternative. It’s even better than soy, too, since soy is known to alter estrogen levels.
Is it difficult to make candles at home?
When I first set out to make candles, I was scared…. I thought it would be a long, messy, difficult process.
But I was proved wrong. It’s actually so easy and not as messy as I would have thought! It only takes about 20 minutes, maybe 30 at the most. Then after you pour the wax into the candle jars, you’ll let it sit for an hour or two to harden and you can use the candles the next day. Easy peasy, right?!

A tip for easier cleanup:
One thing I figured out while cleaning up was that it’s super easy if you place the pot that had the melted wax in it back into the pot that has the hot water after you pour the wax into the candles. Why? Because it re-melts any residual wax, then you can easily wipe it all off with a paper towel. Then wash with hot and soapy water as normal.
Equipment needed
Naturally refined coconut oil* – This helps the candle melt evenly.
Essential oils – I used Warm Citrus by Primally Pure, but use anything you like. You can also make combinations with several if you want.
Candle jars – this recipe makes about 10-12 oz of candle wax, so you can use one large jar or several smaller ones, just make sure there’s room for 12 oz overall.
Why refined coconut oil?
I used refined coconut oil because I didn’t want any coconut scent when the candle was burning (considering I went with Autumn essential oils). However, if you want coconut in the scent of the candle, then I recommend using virgin, unrefined coconut oil. It’s great for a spring and summertime scent!
How to make sure the candle has enough scent
This is all about how much essential oils you use, as well as the quality of the essential oils. Higher quality oils will hold their scent better when in the hot wax. I call for 2 mL of essential oils for this recipe, which is a little under 1/2 tsp. I find that it’s strong enough without overdoing it. Using too many essential oils could be expensive and may also cause headaches if you’re prone to them.

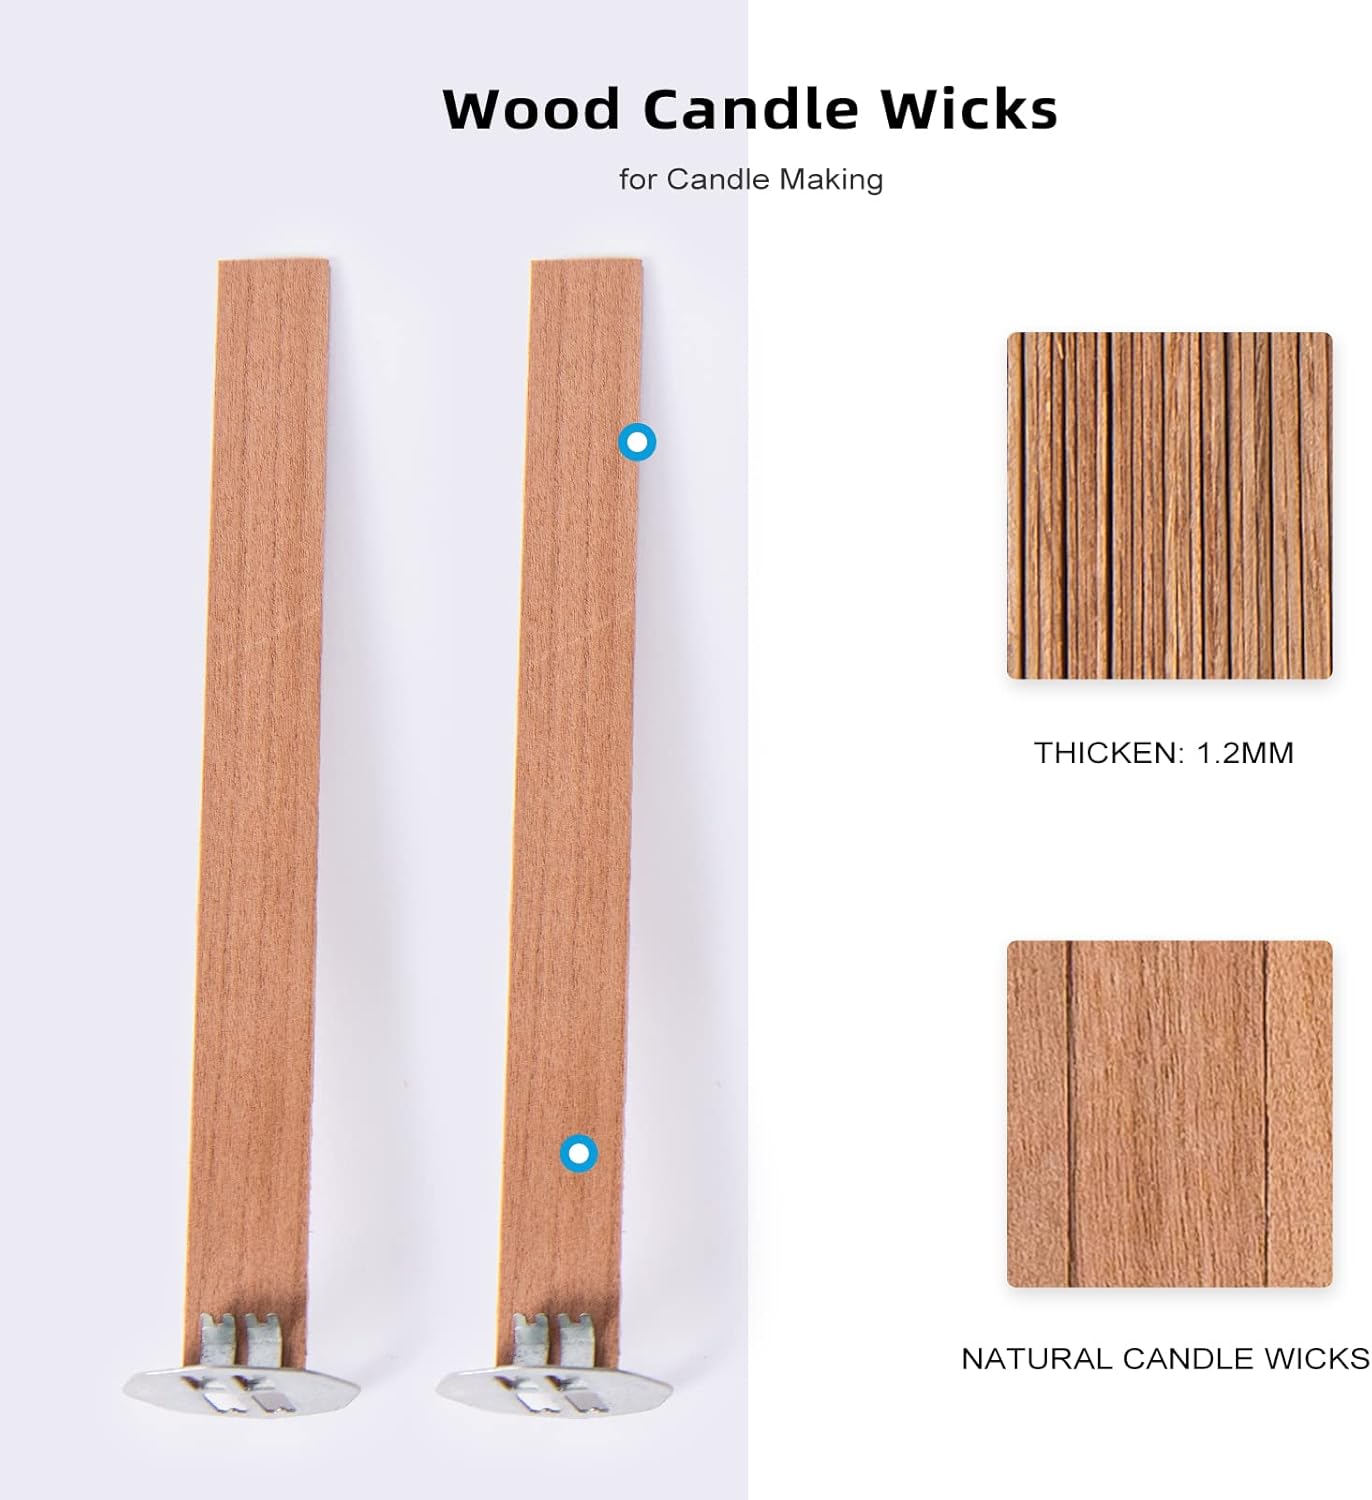
A tip for wooden wicks
The wooden wicks I have make pretty high flames, so I learned to trim the wick very close to the wax. It helps with keeping the flame lower as well as burn the wax slower. The photo in the beginning of the post shows that the wicks are actually a little too long, I recommend trimming more than shown in the photo!
Be sure to trim it before every use. As the candle burns over time, you’ll notice that it’ll be hard to trim the wick with straight scissors, so a wick trimmer will come in handy for trimming it lower into the candle.
A tip for working with beeswax
I have made candles dozens of times over the last couple years and I’ve learned a few important lessons with beeswax:
- It’s good to opt for smaller candle vessels, especially when you’re first starting out on the candle making process. Use a jar that has a 3-4″ opening. Beeswax doesn’t melt quite as easily as other waxes, so it’s helpful to not require the melt pool to be quite as big.
- Do not let the water boil when melting the wax in the double boiler. I find that this can damage the beeswax, and it ends up cratering when hardening in the candle. It creates air pockets that are not only unsightly but also makes the candle not as functional if the crater is too big. I keep track of the temperature of my wax/oil mixture as it’s melting and make sure it doesn’t get above 145ºF. It takes longer to melt, but the wait is worth it.
- Choose your wicks wisely – I’ve had the most success with wooden wicks – they burn hot and help create a bigger melt pool. They also sound delightful! If using cotton wicks – I have found that the smaller tea light wicks are actually best, but you need one for every 1-1.5″ of space in the candle or else you won’t have the full melt pool.
What jars to use as candles?
I found these candle jars and I think they are perfect! I ordered them and will be using them for my next batch of candles. I love that they have labels with them, so you can write names for the candles. It’s especially perfect if you want to give them away as gifts.
You can also use small, wide mouth mason jars if you have them on hand (I recommend 6 oz), or you can use any thick glass or ceramic container. As you can see in my photos, I used ceramic cups. These are actually cups I handmade a few years ago, so I thought it would be super fun to use them for the candles.
PrintDIY Autumn Beeswax Candles

Tired of using chemical-filled candles but still want to enjoy the cozy feel that a glowing candle brings? Beeswax candles are the answer! They are easier to make than you may think – they only take 15-30 minutes to make, then you have beautiful, delicious smelling candles ready to burn whenever you feel like it.
- Prep Time: 5 minutes
- Cool Time: 1 hour
- Cook Time: 10 minutes
- Total Time: 1 hour 15 minutes
- Yield: 2 (6-oz) candles 1x
- Category: DIY
- Method: Stovetop
Ingredients
8 oz beeswax
75g refined coconut oil* (1/3 cup)
2.5 mL essential oils (1/2 tsp) – I used Warm Citrus by Primally Pure
7-oz candle jars with 3-inch opening
Instructions
- Prepare the candle jars: Stick the wicks to the bottom in the center of the candle. If the candle jar is wider than 4″, then consider placing two wicks in it to make sure the edges melt as well. The wick will likely be too long, but you’ll trim it as needed. I prefer to trim it now because it makes it much easier (just remove it and cut with scissors to desired length).
- Set up a double boiler on the stove with the heat on med-high. You want the water to be hot or to very lightly simmer, but do not boil. If you don’t have a double boiler, you can create your own by putting water in a large pot (about 1/3-1/2 full), then placing a smaller pot into the water.
- In the top pot, add the beeswax and coconut oil and stir until melted. It’ll take about 15 minutes. You don’t want it to get too hot, so a slow melt is good. If it gets too hot, then it may damage the beeswax and it will end up drying incorrectly in the jar. If you have a kitchen or candy thermometer, then keep it in the wax and make sure it doesn’t go above 145ºF.
- Once melted, remove from heat. Add the essential oils and stir until incorporated. Let it cool for 5 minutes.
- Carefully pour the wax mixture into the prepared candle containers, making sure the wick stays straight. Leave about 1/4-1/2″ of wick above the wax. Let the candle rest for an hour or two for the wax to harden. Trim the wick as needed. Let the candle sit for at least a day before lighting.
- Be sure to trim the wick after every use.
- Tip for easy cleanup: Put the top pot (that had the candle wax in it) back onto the bottom pot of hot water – this will melt any residual wax in the pot, then you can wipe it off with a paper towel. Then clean as normal with hot water and dish soap.


Notes
*You can used unrefined coconut oil, but keep in mind that it’ll have a coconut scent to it. This is great if you want a fruity candle! Since I was making an Autumn-inspired candle, I opted for refined coconut oil.


