This post may contain affiliate links, which means I make a small commission off items you purchase at no additional cost to you. Please read my disclaimer page.
If you want to enjoy cozy Christmas candles during the holiday season but want to avoid the chemicals in conventional candles, then try making these Homemade Christmas Beeswax Candles! It’ll only take you about 30 minutes to make them (and a day to let them fully dry before lighting) and you have a cozy-smelling candle for weeks. These candles are also the perfect DIY gift to give for Christmas.
I have been testing homemade candles for several years now. I’ve made dozens and dozens of candles to figure out all the tiny details that matter, from the ratio of beeswax to coconut oil, to the type of beeswax, the type of candle container, the heating method, the wick size, and more. It has truly been trial and error but I figured it out! So be sure to read through the post to its entirety to have the best outcome! It is well worth it to create a non-toxic, incredible-smelling candle for your home. You can easily replace your toxic Bath and Body Works candles with this homemade beeswax candle recipe!
Benefits of beeswax candles
- Less chemicals. The ingredients are beeswax, coconut oil, and essential oils; so it’s made without chemicals and also does not create any toxic byproducts when being burned.
- Beeswax is a natural air-deodorizer and purifier.
- You can make your own unique scents – instead of choosing pre-made scents, you can create your own combinations. Get creative!
- Hormone friendly – Candles loaded with chemicals are pretty bad for our health, and specifically our hormone health. Opt for natural, beeswax candles for a healthier alternative. It’s even better than soy, too, since soy is known to alter estrogen levels.
Is it difficult to make beeswax candles at home?
Yes and no. It’s super easy to do – but you do need to fully read the post and understand what the process is and the requirements for it to turn out the best it can be. I recommend you read through the post and the instructions thoroughly before getting started. Once you start, it only takes 30 minutes to make the candles. Then after you pour the wax into the candle jars, let it sit for a day to fully harden.
Equipment needed for beeswax Candles
Naturally refined coconut oil* – This helps the candle melt evenly.
Essential oils – I LOVE the Christmas Morning essential oil by Revive. It smells heavenly! Their essential oils are also high-quality and affordable; and they always have free shipping on every order (in the US at least). But feel free to pick whatever scent you want.
7-oz candle jars that are 2.5″ wide – this recipe makes about 12-14 oz of candle wax, so it will make two small 7-oz candles. I recommend sticking to these candle jars that are 2.5″ in width and either using one properly prepared wooden candle wick or THREE tea light wicks. Beeswax is fantastic because it’s all natural, but it’s also more finicky when it comes to an even melt pool, so these are my best recommendations for a successful candle!
Candy thermometer or if you have a meat thermometer on hand then that’ll work too
Wick trimmer (necessary for wooden wicks)
Tape measurer – to make sure you cut the wicks to the right size. A flimsy one works best here in my opinion.
Why refined coconut oil for Christmas Beeswax Candles?
I used naturally refined coconut oil (using no chemicals) because I didn’t want any coconut scent when the candle was burning (considering I went with Christmas essential oils). However, if you want coconut in the scent of the candle, then I recommend using virgin, unrefined coconut oil. It’s great for a spring and summertime scent!
How to make sure the candle has enough scent
This is all about how much essential oils you use, as well as the quality of the essential oils. Higher quality oils will hold their scent better when in the hot wax.
I call for 2.5 mL of essential oils for this recipe, which is 1/2 tsp. For most scents, this will give off a noticeable scent but may not fill the entire room with the scent. Keep in mind, some essential oils are stronger than others too (I find that warm ones like cinnamon, nutmeg, etc. are stronger than fruity ones like orange). If you are wanting a strong candle that fills the room with scent, then opt to use 1 tsp of essential oil instead. I would especially opt for more if using a very mild smelling scent.
What brand of essential oils should I use?
You definitely need to be cautious about the brand of essential oils you buy, because some companies use fragrance and other chemicals in their oils unfortunately. Quality control and ethical sourcing can also be questionable with some companies as well. Don’t ever buy essential oils from places like Hobby Lobby – they’re low-quality, impure, and some are actually fragrance – not true essential oil.
I personally love Revive! They have high quality oils that are tested and honest. They are transparent about everything, including where they source their essential oils. They’re also way more affordable than some of the popular brands like Doterra and Young Living (both of which are still great to use if you have them!). And I love that Revive always has free shipping and free returns. I also love Plant Therapy as well, although I haven’t used them as much as Revive for candles, they do work.
Trimming the wicks
Be sure to trim it before every use. As the candle burns over time, you’ll notice that it’ll be hard to trim the wick with straight scissors, so a wick trimmer will come in handy for trimming it lower into the candle.
I love using regular wicks as well – but you have to use one for every 0.75-1 inches in the candle because they don’t burn as hot, so candles can tunnel more easily. You’ll also want to trim these after every use as well.
Tips for working with beeswax
I have made candles dozens of times over the last few years and I’ve learned a few important lessons with beeswax:
- It’s good to opt for smaller candle jars, especially when you’re first starting out on the candle making process. Use a jar that has a 2-2.5″ opening. Beeswax doesn’t melt quite as easily as other waxes, so it’s helpful to not require the melt pool to be quite as big.
- Do not let the water boil when melting the wax in the double boiler. I find that this can damage the beeswax, and it ends up cratering when hardening in the candle. It creates air pockets that are not only unsightly but also makes the candle not as functional if the crater is too big. I keep track of the temperature of my wax/oil mixture as it’s melting and make sure it doesn’t get above 145ºF. It takes longer to melt, but the wait is worth it.
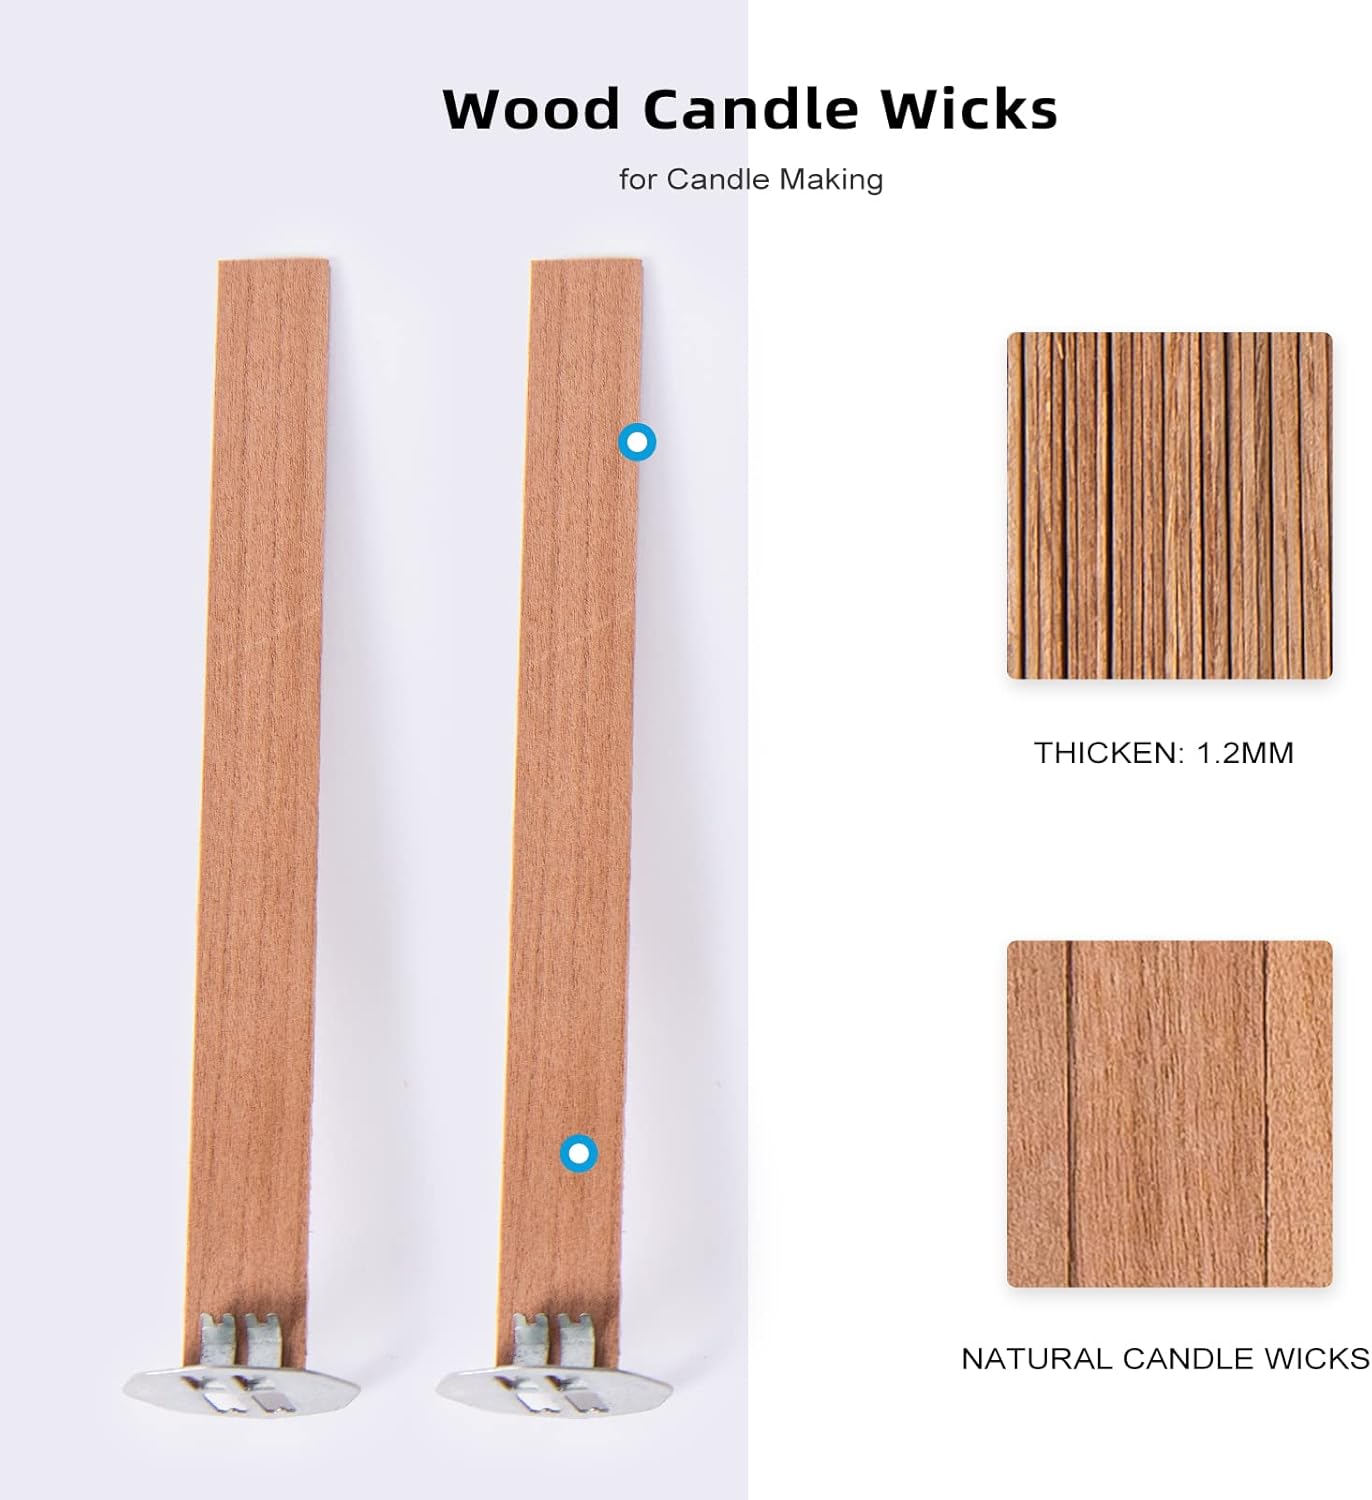
- Choose your wicks wisely – I’ve had the most success with wooden wicks – they burn hot and help create a bigger melt pool. They also sound delightful! If using cotton wicks – I have found that the smaller tea light wicks are actually best, but you need one for every 0.75-1″ of space in the candle or else you won’t have the full melt pool.
What candle jars are best for beeswax candles?
I find that picking the right candle container is VERY important. First off, you want it to be a jar that is specifically designed for candles. I’ve played around before with using other fun containers, like ceramic mugs or random glass containers, but I find that they produce inconsistent results with the flames burning too hot or not hot enough. Using a glass jar specifically designed for candles that has the perfect thickness of glass is very helpful for having the proper flame height and heat on the wick. With that said, you are more than welcome to experiment with fun mugs and such – but please just know that it may turn out different and I can’t guarantee that the flame will burn at the perfect height and heat.
Another important factor for the candle jar is the width of the jar matching the type / amount of wicks you use. For this recipe, I specifically call for a 2.5″ wide, 7-oz candle jar and you will successfully create the right flame heat and melt pool using either one prepped wooden wick or three tea light wicks. If you are using a wider jar (like a 4″ candle jar for example, then you will want to adjust the amount of wicks that you use, which would be 2 wooden wicks or 4 tea light wicks. You can read more about this on the recipe card instructions section.
A tip for easier cleanup
Place the pot that had the melted wax in it back into the pot that has the hot water to re-melt the wax. Re-melting the residual wax makes it easy to wipe off with a paper towel. Then wash with warm and soapy water as normal.
Other DIY recipes you’ll love
Please be sure to let me know if you tried out making these Homemade Christmas Beeswax Candles! I would love to hear how it went and what scent you chose to use. The engagement also helps my website significantly, so I really appreciate it! 🙂
PrintHomemade Christmas Beeswax Candles
These candles are the perfect DIY gift to give for Christmas, or just a non-toxic gift to yourself to enjoy a cozy candle during the holidays without all the chemicals!
- Prep Time: 15 minutes
- Set Time: 24 hours
- Cook Time: 20 minutes
- Total Time: 30-45 minutes working time, 1 day candle hardening time
- Yield: 2 (7-oz) candles 1x
- Category: DIY
- Method: Stovetop
Ingredients
80g naturally refined coconut oil* (1/3 tightly packed cup – make sure there are no empty spaces)
226g (8oz) beeswax** – the quality of beeswax is VERY important – read notes!
2.5 ml essential oil (1/2 tsp) – I used Christmas Morning by Revive, Increase to 3/4-1 tsp if using a mild scent like orange
Two 7-oz candle jars with 2.5-inch opening – using the right candle jar is also important, read notes
2 Wooden wicks or 6 tea light wicks
Instructions
Advice for wicks in different sized candles: One prepped wooden wick should melt a 2.25-2.5″ pool after 3-4 hours, and THREE tea light candle wicks should melt a 2.5″ pool after 3-4 hours. My general rule of thumb is to use 1 prepped wooden wick for every 2-2.5 inches of candle width and one tea light wick for every 0.75-1″ of candle width. So for example, if you end up using a 4″ wide candle jar, then you’ll want to use two wooden wicks, or 4 tea light wicks. For this specific recipe that uses a 2.5″ wide candle, you can either use one prepped wooden wick, or three tea light wicks.
- Set up a double boiler on the stove with the heat on medium heat. You want the water to be steaming, but do NOT simmer or boil. If you don’t have a double boiler, you can create your own by putting water in a large pot (about 1/3-1/2 full), then placing a smaller pot into the water.
- Turn your oven light on (you’ll place the candle containers in here to make them a little warmer).
- Prepare the candle containers: Stick the wick(s) into the bottom of the candle jar. The wick will be too long, but you’ll trim it as needed before lighting the candle, so leave it long for now. Place the candle jars in the oven with ONLY the light on. Do not turn the oven on. Just the light to keep the candles in a warm-ish place – this will help the wax pouring process. If the candle jar is cold and you’re pouring hot wax into it, then it can make the wax harden too fast and pull away from the sides of the candle.
- Put the top pot of the double boiler on a kitchen scale and reset the scale to 0. Add the coconut oil and beeswax, then return the pot to the double boiler bottom pot with the steaming water. Stir constantly until melted. You can use a silicone spatula, long wooden popsicle stick, or just simply a spoon to stir it. It’ll take up to 15 minutes to melt fully. You don’t want it to get too hot, so a slow melt is good. If it gets too hot, then it may damage the beeswax and it will end up creating air pockets in the candle jar. I recommend using a candy thermometer or meat thermometer to keep track of the temperature, making sure it doesn’t go above 145 or 150ºF. This will take being very careful and keeping an eye on the temperature as the wax starts to fully melt – remove from heat if needed to cool it down.
- Once melted, turn the heat down to low and/or remove from heat for several minutes if needed (if it’s 150ºF, then you’ll want to remove it so it doesn’t keep getting hotter).
- If using a wooden wick, you’ll want to prep it with a coating of wax: Remove the wooden wick from its metal holder to prepare the wooden wick by submerging the wick in the melted wax for a full minute – you can use tongs for this. The wooden wicks absorbs some of the wax, which makes it burn much easier and more evenly to create a better melt pool. Remove from the wax and hold in the air for 20 seconds or so to let it start hardening, then let it rest on a glass or metal surface (such as the counter or a plate) to harden further.
- Remove the beeswax and coconut oil mixture from the heat if you haven’t already. Add the essential oils and stir together. Make sure most of the mixture is melted and there’s not too much dried up on the sides of the pot – just scrape it down and melt it if needed before pouring into the candle jars.
- Put the prepped wooden wick back into the wick holder (if using).
- Once all wicks are in place, pour the wax mixture into the prepared candle containers, making sure the wicks stays straight. If the wax hardens on the edges of the double boiler, just return the pot to the hot water to re-melt it to pour again. Leave the candle in place and be careful not to bump it to prevent any craters or crooked wicks.
- The candle will be solid within an hour or two, but I recommend letting the candle sit for at least a day before lighting because although it looks ready to light, it’s good to let the beeswax settle more before lighting so that the melt pool is consistent. Trim the wicks as needed before lighting. For wooden wicks, trim the wick to a short length of 1/8″ for a hot flame that will make a full melt pool. For regular cotton wicks, be careful NOT to trim any lower than 1/4″ or else it may not be able to burn hot enough for a full melt pool! I personally keep mine closer to 3/8 of an inch. Wooden and cotton wicks are very different in terms of wick length.
- Keep in mind that a lot of cotton wicks self-trim and won’t need trimmings after the first burn. You’ll likely need to trim wooden wicks after each burn though.
- Let the candles burn for at least 3 hours the first 2-3 times you light it. Wax has a “memory” and if you blow it out before it reaches a full melt pool (or at least close to it), then it’s more likely to tunnel.
- Tip for easy cleanup: Put the top pot (that had the candle wax in it) back onto the bottom pot of hot water – this will melt any residual wax in the pot, then you can wipe it off with a paper towel. Then clean as normal with warm water and dish soap.
Notes
*You can used unrefined coconut oil, but keep in mind that it’ll have a coconut scent to it. This is great if you want a fruity candle! Since I was making an Autumn-inspired candle, I opted for naturally refined coconut oil.
**The quality of beeswax is very important because it needs to be pure and not denatured in any way. Using a beeswax that has not been overheated at any point is important for creating a candle that does not tunnel when hardening (which then also messes up how it melts). I have been loving the Beesworks brand.
Using a candle container that’s specifically designed for candles is important in my opinion. Having a candle jar with the right thickness of glass really helps to create a consistent result with flame on the wick burning at the right temperature. I’ve experimented with using other random jars and such, but it creates very inconsistent results and leads to either tunneling or a wick that burns way too hot or both.


