This post may contain affiliate links, which means I make a small commission off items you purchase at no additional cost to you. Please read my disclaimer page.
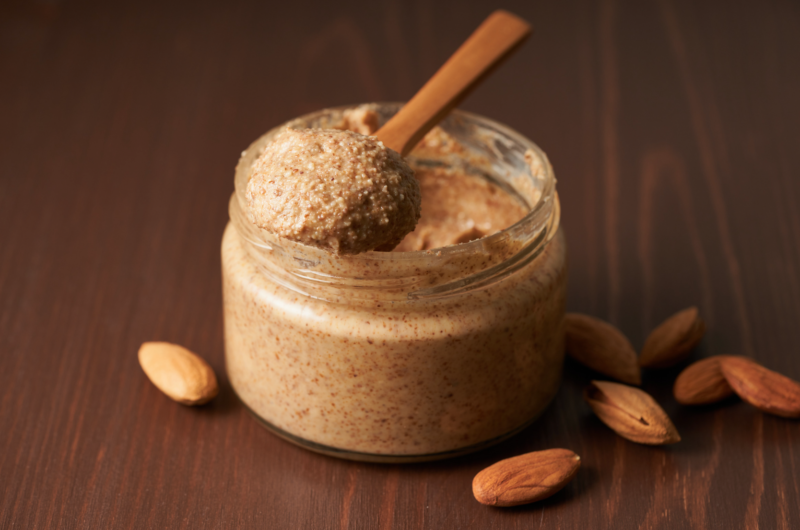
Are you a nut lover looking to elevate your culinary adventures? Homemade nut butter might just be your next masterpiece! With its rich flavor, creamy texture, and endless customization possibilities, creating nut butter at home is not only rewarding but also healthier and more budget-friendly than store-bought options. In this comprehensive guide, I’ll take you through the steps of making it yourself, from choosing the nuts to adding personalized twists that will leave your taste buds dancing.
Why make nut butter at home?
While store-bought nut butter might offer convenience, the homemade version takes the experience to a whole new level. Here are some compelling reasons to roll up your sleeves and get to work:
- Ingredient Control: When you make nut butter at home, you have complete control over the ingredients. You can avoid vegetable oils, refined sugar, and customize the flavor to your liking.
- Freshness: Homemade nut butter is as fresh as it gets. You can enjoy the pure, unadulterated taste of the nuts without any preservatives or stale flavors.
- Texture Preference: Whether you like it smooth or crunchy, homemade nut butter lets you achieve the perfect consistency that suits your preferences.
- Variety: From classic options like almond and peanut to gourmet choices like macadamia and pistachio, you can explore a wide range of varieties and combinations. Feel free to blend several different types of nuts to create a fun flavor – and also remember that you can add seeds to the mixture as well!
- Cost-Effective: Nuts can be expensive when bought in pre-made nut butter jars. Simply speaking making it at home is more budget-friendly.
Getting started: Choosing the nuts
Here are some popular options to consider:
- Almonds: Mild and versatile, almonds create a creamy, slightly sweet nut butter.
- Cashews: With their natural buttery texture, cashews yield a velvety smooth nut butter.
- Walnuts: Earthy and slightly bitter, walnuts produce a nut butter with a unique flavor profile.
- Pistachios: Pistachios create a rich and indulgent nut butter with a creamy texture, a delicate sweetness, and a hint of earthiness.
- Hazelnuts: A velvety, decadent spread that is perfect for indulging on toast, in desserts, or as a flavorful ingredient in both sweet and savory dishes.
- Peanuts: Classic and budget-friendly, peanuts make a deliciously rich and hearty butter.
What’s the process?
Creating nut butter at home is a straightforward process that requires minimal ingredients and equipment. Here’s a step-by-step guide to get you started:
Ingredients:
- Nuts of choice (around 2 cups)
- Optional: Salt, sweeteners (honey, maple syrup, coconut sugar), flavorings (cinnamon, vanilla extract, etc.)
Equipment:
Steps:
- Choose the Ingredients: Choose which nuts you are using, whether it’s one or multiple. You can also add seeds to the mixture as well, such as sunflower seeds, flax seeds, pumpkin seeds, etc. Lastly, remember to add salt and your desired flavors (honey, cinnamon, vanilla, etc.)
- Roast the Nuts (Optional): To enhance the flavor of the nut butter, consider roasting the nuts in the oven at 350°F (175°C) for about 5-10 minutes until they’re fragrant and slightly golden. This step is optional but highly recommended for a deeper flavor profile. Be sure to watch them closing as they’re baking, because they can burn quickly.
- Blend the Nuts: Place the roasted (or raw) nuts into your food processor or blender. Start blending at a low speed, gradually increasing to high. You might need to stop occasionally to scrape down the sides of the container.
- Achieve Desired Consistency: As you blend, you’ll notice the nuts going through different stages. At first, they’ll become crumbly, then form a paste, and finally, transform into a creamy butter. This process can take anywhere from 5 to 15 minutes, depending on the nuts and your equipment.
- Customize Your Nut Butter: At this point, you can add any optional ingredients you desire. I recommend adding salt to enhance the flavor, and sweeteners and spices can take it to a whole new level. Experiment with different combinations to find the perfect flavor profile.
- Storing the Nut Butter: Transfer the freshly made nut butter into clean, airtight jars. It can be stored at room temperature for a short period, but for longer shelf life, it’s best to refrigerate it. If you added salt to the mixture then it’ll last longer as well.
Tips and tricks for success
- Patience is Key: The blending process might take longer than you expect, but don’t rush it. Allowing the nuts to release their natural oils gradually is crucial for achieving that creamy texture.
- Texture Adjustment: If your nut butter is too thick, you can add a touch of oil (such as coconut oil) to achieve your desired consistency. If it’s too runny, you can blend in more nuts. A higher quality food processor will create a creamier texture. But no worries, if you have a budget friendly food processor, it’ll still work! You just may want to add a touch of oil to help create a creamy texture if you want.
- Experiment with Flavors: Get creative with your nut butter by adding spices like cinnamon, nutmeg, or even a touch of cocoa powder for a chocolatey twist (specifically great with hazelnut butter!).
- Nut Combinations: Don’t limit yourself to a single nut variety. Mix different nuts (and seeds) to create unique and complex flavors.
- Mindful Sweetening: When adding sweeteners, start with a small amount and taste as you go. You can always add more, but you can’t take it away.
- Mindful Salting: The same goes for adding salt, start small and add to taste. You can always add more, but can’t take away.
Flavors – the options are endless!
Choose from the suggestions below for inspiration!
Salted caramel – 2 cups roasted, unsalted cashews or almonds, 1/3 tsp salt (to taste), 1 Tbsp coconut oil, 3 Tbsp coconut sugar, 1 1/2 tsp vanilla extract
Maple – 2 cups cashews or almonds, 1/4 tsp salt (to taste), 3 Tbsp maple syrup, 1/2 tsp maple extract
Cinnamon – 2 cups nuts of choice, 1/4 tsp salt, 1 1/2 tsp cinnamon (to taste), 1 Tbsp oil if needed for creamier texture
Chocolate hazelnut (Nutella) – 2 cups roasted, unsalted hazelnuts, 1/4 tsp salt, 1/4 cup cacao powder, 2 Tbsp avocado oil or coconut oil, 1/3 cup coconut sugar, 1 1/2 tsp vanilla extract
Vanilla cashew butter – 2 cups roasted, unsalted cashews, 1/4 tsp salt (to taste), 1 vanilla bean
Cinnamon vanilla pecan butter – 2 cups roasted, unsalted pecans, 1/4 tsp salt (to taste), 1 1/2 tsp cinnamon, 2 tsp vanilla extract, 2 Tbsp coconut sugar (optional)
Superfood nut butter – 2 cups roasted, unsalted nuts, 1/2 cup roasted, unsalted pumpkin seeds, 2 Tbsp flaxseeds, 2 Tbsp chia seeds, 1/2 tsp salt, 2 Tbsp coconut oil, 1 tsp cinnamon (optional)
Honey walnut butter – 2 cups roasted, unsalted walnuts, 1/4 tsp salt, 1 1/2 Tbsp coconut oil, 2 Tbsp honey
Pumpkin pie – 2 cups roasted, unsalted almonds, cashews, or pecans, 1/4 tsp salt, 1 Tbsp avocado oil or coconut oil, 1 1/2 tsp pumpkin pie spice, 2 Tbsp coconut sugar
Crafting nut butter at home is a delightful journey into the world of flavors and textures. With a few simple ingredients and some patience, you can create a versatile and delicious spread that not only elevates your meals and snacks but also showcases your culinary prowess. So, gather your favorite nuts, fire up that food processor, and get ready to experience the nutty magic of homemade nut butter like never before. Your taste buds will thank you!
Let me know if you made this recipe, I would love to know how it went! 🙂
PrintHow To Homemake Nut Butter
Crafting nut butter at home is a delightful journey into the world of flavors and textures. With a few simple ingredients, you can create a versatile and delicious spread that not only elevates your meals and snacks but also showcases your culinary prowess.
- Prep Time: 20 minutes
- Total Time: 20 minutes
- Yield: 10 servings 1x
- Category: How To Guide
- Method: Food processor
Ingredients
2 cups roasted, unsalted nuts of choice (or see instructions for raw)
1/4 tsp salt, more to taste
See post for flavor options if wanted!
Instructions
- If using raw nuts, you can use them as they are or you can roast them in the oven for a more delicious flavor: Preheat oven to 350ºF. Spread out the nuts on a large baking sheet then cook for 7-10 minutes until slightly brown. Be very careful not to burn them. Cool for 10 minutes. If using sprouted nuts, they’ll be ready in 4-7 minutes.
- Transfer nuts to a food processor and process for 10-15 minutes, scraping down the sides as necessary, every couple of minutes. The nuts should go from whole, to meal, to clumps, to creamy nut butter. If you would like a creamier nut butter, then add 2-3 tsp of coconut oil.
- Add in the salt and process until combined, about 30-60 seconds. You can also add in any desired extra ingredients such as vanilla extract, coconut sugar, cinnamon, etc. Taste and add more salt or other desired ingredients if necessary.
- Please leave a review if you made this recipe. It helps my website more than you know. Thank you!!


Pingback: Pumpkin Crumb Cake (no refined sugar) » Home Cooked Living
Pingback: Crushed Chili Pistachios » Home Cooked Living