This post may contain affiliate links, which means I make a small commission off items you purchase at no additional cost to you. Please read my disclaimer page.
The ingredients I use
This delicious, nourishing pumpkin bread is super easy to make with a few pantry staples. Here are some tips for a few of the ingredients:
- Pumpkin puree: Fall season is upon us! Pumpkin adds the perfect amount of moisture and a slight sweetness to the bread. I use canned pumpkin but feel free to test it with homemade pumpkin puree if that’s what you prefer.
- Oat flour: You’ll also be using oat flour so that this bread bakes up perfectly. Feel free to use certified gluten free oat flour.
- Super-fine Almond flour: This keeps the bread gluten free and adds healthy fats. Be sure to use a fine, blanched almond flour for the right texture. I also encourage you to measure your almond flour to make sure you use the perfect amount. You can find an inexpensive kitchen scale on Amazon (it’s the one I use!). It’s so great to have on hand for baking recipes! I have mine in my cabinet and I love being able to grab it easily for any recipe I’m testing.
- Baking Soda & Baking Powder: It’s important to always use fresh baking soda and baking powder in your recipes. Recipes will turn out best if they’ve been opened for a month or less. I write the date on them that I opened them and I replace them the next month on that day. For the old baking soda, I’ll put it in the back of my refrigerator (baking soda is great for absorbing odors and keeping the air fresh!).
The baking pan
I prefer to use an 8 x 4 metal loaf pan. This ensures the bread is as thick as possible, rather than using a larger pan where the batter doesn’t fill as high. If you use a glass pan then keep in mind that glass heats up slower and stays hot a lot longer so you’ll definitely want to remove the bread from the pan to cool on a wire rack (about 10 minutes after taking out of the oven).
How to store pumpkin bread
Once the bread has cooled to room temperature, wrap it in plastic wrap then in foil and store on the counter for up to 3 days. This wrapping technique locks in the moisture and keeps it fresh. You can also store in the refrigerator for up to a week with the same wrapping method.
How to freeze pumpkin bread
Wrap in plastic then in foil and then place in a reusable bag or freezer friendly bag for up to 3 months. Thaw at room temperature once you are ready to eat. You can also freeze individual slices if you only want to take a little out at a time.
PrintOat Flour Pumpkin Bread
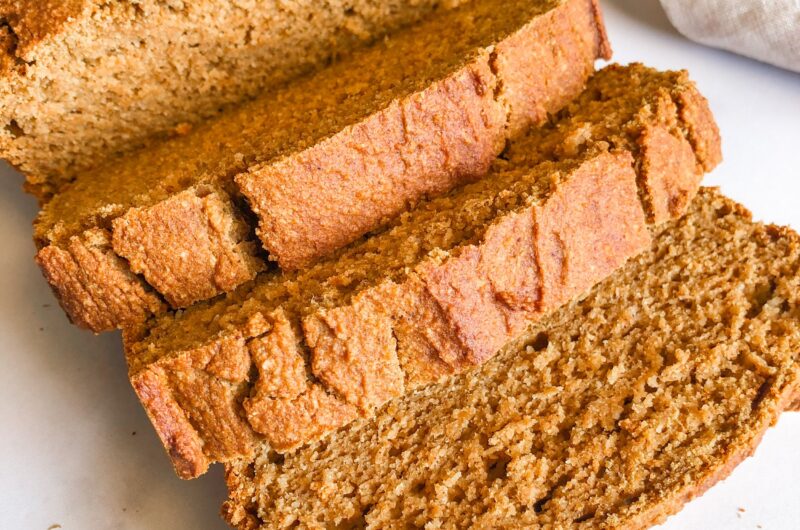
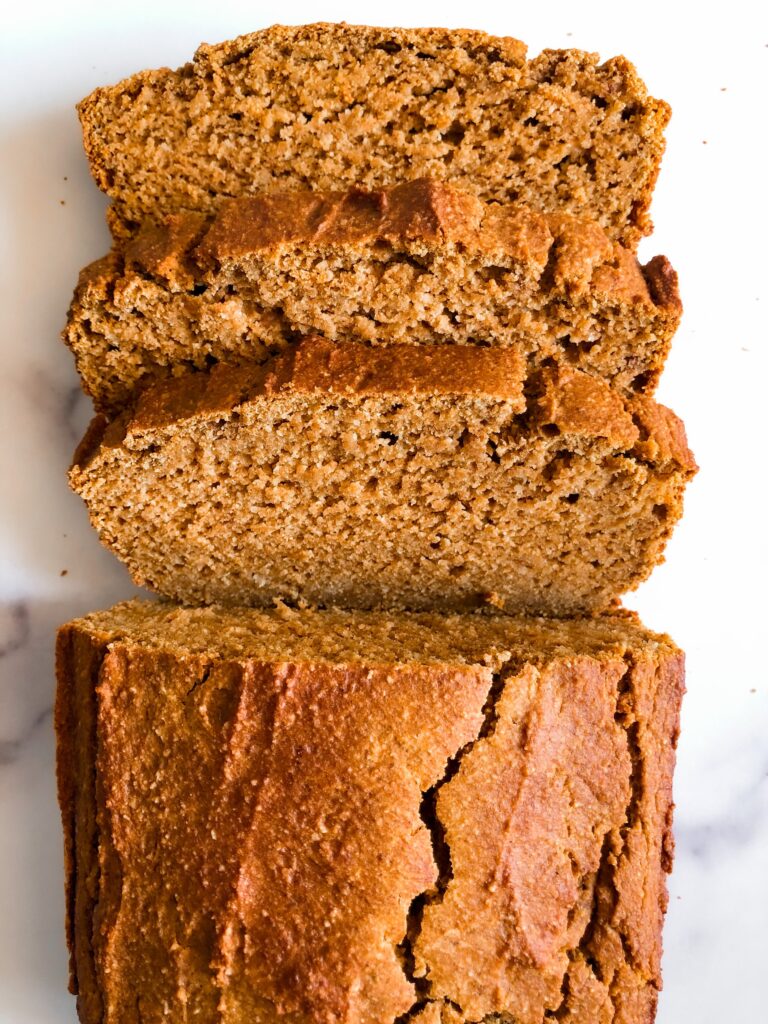
This delicious pumpkin bread is naturally sweetened with maple syrup, is dairy free and gluten free, and is packed with nourishing ingredients and warm spices.
- Prep Time: 15 minutes
- Cook Time: 50 minutes
- Total Time: 1 hour 5 minutes
- Yield: 12 servings 1x
- Category: Breakfast, Snack
- Method: oven
- Cuisine: American
Ingredients
1 cup pumpkin puree
3 large eggs
1/3 cup pure maple syrup
2 1/2 teaspoons vanilla extract
170 grams (about 1 1/2 cups) oat flour
95 grams (3/4 cup very lightly packed) “super-fine” almond flour (not almond meal)
2 teaspoons pumpkin pie spice
1 teaspoon cinnamon
1 teaspoon baking soda (make sure it’s fresh!)
1/2 tsp baking powder (make sure it’s fresh!)
1/2 teaspoon salt
Instructions
- Preheat the oven to 350ºF. Spray a 8 x 4 inch loaf pan* with nonstick cooking spray (or rub oil or butter on with a paper towel). Set aside.
- In a large bowl, mix together the pumpkin puree, eggs, pure maple syrup and vanilla extract until well combined. Add in the oat flour, almond flour, pumpkin pie spice, cinnamon, baking soda and salt. Fold together with a spatula until no lumps remain.
- Pour batter into prepared loaf pan, smoothing the top with a spatula. Bake for 50-53 or until a toothpick comes out clean in the middle of the bread – it’s normal if there are a few crumbs that stick to it.
- Cool bread for 10 minutes in the pan. Then loosen the bread from the pan by carrying a knife all along the edge of the bread between the pan. Transfer bread to a wire rack to finish cooling completely. It’s important to remove the bread so that it’ll cool quicker and stop cooking.
- The bread tastes best the next day.
- For best storage: Once completely cooled (a couple hours), wrap the bread in plastic wrap then in aluminum foil and store on the counter for up to 3 days. This wrapping technique locks in the moisture and keeps it fresh. View post above for refrigerator and freezer directions.
- Please leave feedback and your review if you made this recipe! Thanks!
Notes
I prefer to use an 8 x 4 metal loaf pan. This ensures the bread is as thick as possible, rather than using a larger pan where the batter doesn’t fill as high.
If you want to precisely measure the grams of the almond flour and oat flour, you can get this inexpensive kitchen scale on Amazon. It’s the one I use and it’s so great to have on hand for baking recipes. I store mine in my cabinet and I love being able to grab it easily for any recipe.
It’s important to use fresh baking soda and baking powder or else baked goods may not properly rise in the oven. Whenever I open a new box, I write the date on it to track when it was opened. I replace mine every 30 days. Hint: For baking soda, instead of throwing it out when it’s been opened more than a month, stick the box in the back of your refrigerator! This helps keep the refrigerator fresh.


This is the best of the Pumpkin Oat/Almond flour recipes I’ve found on the internet. The others were too dense. This will be a regular. Thank you!
Wow, that makes me so happy! I’m glad to hear you loved it! Thanks so much for taking the time to leave a review 🙂
I’ve made this loaf twice now. Really enjoying it as a Fall treat! Added chocolate chips for some extra sweetness this last time. Yummy!
So glad you’ve been enjoying it, and chocolate chips sound incredible in this loaf!!
Pingback: Healthier Banana Bread » Home Cooked Living
Pingback: Pumpkin Muffins with Coconut Sugar » Home Cooked Living